You've got the raw session open, the guest sounded solid in the call, and now the files are sitting there with fan noise, uneven levels, and a few awkward pauses you can hear before you even hit play. That's the starting point for editing audio for podcast, not a tidy checklist, but a set of decisions about what to fix, what to leave alone, and what would sound worse if you touched it.
The best edits don't announce themselves. They clean up the recording, keep the conversation natural, and let listeners forget there was ever a rough draft.
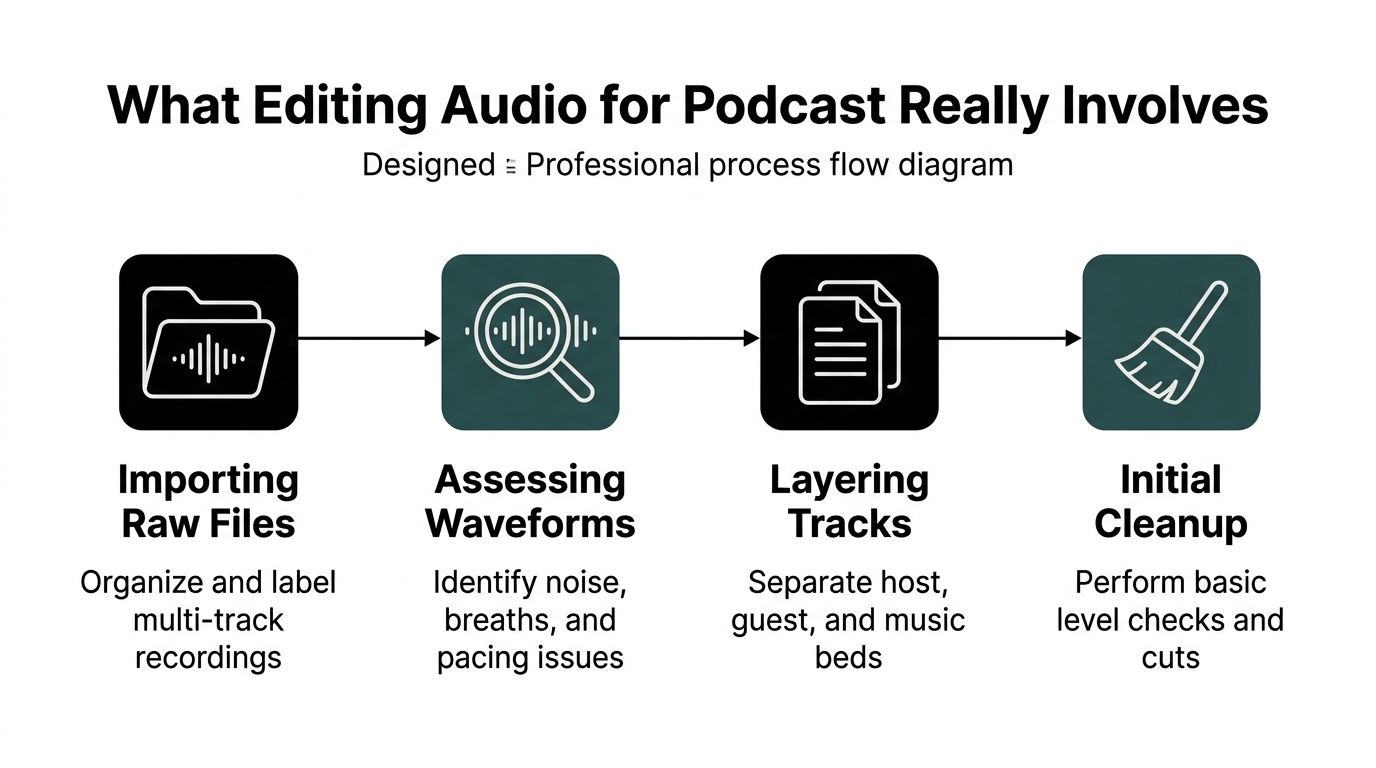
Table of Contents
- What Editing Audio for Podcast Really Involves
- Preparing Your Files and Workspace Before Editing
- Cleaning the Track Through Noise Reduction and Dialogue Isolation
- Shaping Voice With EQ, Compression, and Leveling
- Editing for Pacing, Clarity, and Listener Retention
- Choosing Between DAW, Transcript, and AI Editing Workflows
- Export Settings, Platform Optimization, and Final Quality Checks
What Editing Audio for Podcast Really Involves
Raw podcast files usually look and sound like a series of small problems, not one big one. A laptop fan sits under the host's voice. The guest trails off. One track is hot, another is thin, and the room tone shifts every time someone leans back from the mic.
That's why editing is a sequence, not a single action. First you prepare the files, then you clean the obvious defects, then you shape tone and dynamics, then you tighten pacing, and only after that do you decide whether DAW work, transcript editing, or AI cleanup makes the most sense for that episode. A 2026 industry summary says podcast editing often runs 2x to 6x the raw recording time, and adding video can increase post-production time by 30% to 80%, which is exactly why the sequence matters so much for creators publishing both audio and video episodes. SSRS research on audio media
The core question is not “How do I edit this” but “What deserves touching”
Most newer editors reach for the strongest fix first. That usually creates the problem they were trying to avoid. Heavy denoising, over-compression, and too many repair plugins can strip warmth out of voices and make an interview sound processed instead of professional.
Practical rule: if a recording already feels listenable, aim for invisible edits, not dramatic rescue.
A better mental model is simple. Clean up what blocks comprehension, leave natural rhythm in place, and skip any step that would make the speaker sound less like themselves. That's especially true on interview shows, where a little breath, room tone, and overlap helps the conversation feel alive.
The workflow in this guide follows the order that usually works
The sequence I trust most starts with preparation, moves into noise reduction and dialogue cleanup, then EQ and compression, then pacing edits. After that comes the decision about DAW versus transcript versus AI tools, then export, then platform checks. That order keeps you from polishing a bad file before you've fixed the obvious defects.
A 2026 podcast statistics source says podcasters spend an average of 3 hours per episode editing audio, and another source cited in the same search results says 68% use a digital audio workstation for editing. Those numbers match what I see in practice, podcast editing is standard work, and DAW-based workflows still dominate the old-school cleanup process for noise reduction, transitions, and final polish. Zipdo podcast editing statistics
Preparing Your Files and Workspace Before Editing
Good editing starts before you touch a plugin. If the source media is messy, the session stays messy. If the file names are vague, the timeline gets confusing. If you start with clipped audio, every later step has less room to work.
The practical default is straightforward. Capture or request 48 kHz, 24-bit WAV mono per speaker, keep a clean folder structure, and open a session template that already has labeled tracks, color coding, and a master bus ready for processing. If you're still choosing capture gear, a focused guide like best audio interface for podcasting can help you avoid interfaces that look fine on paper but create gain or routing headaches later.
Set headroom before you ever normalize
Recording with headroom saves edits later. A useful target is peaks around -6 dBFS during capture, which leaves space for processing and makes it easier to match voices without constant clipping fear. Once you're already clipping, every correction becomes a compromise.
Here's the setup I'd use today for a clean, repeatable workflow.
| Setting | Recommended Value | Why It Matters |
|---|---|---|
| Sample rate | 48 kHz | Keeps the session aligned with video and modern podcast workflows |
| Bit depth | 24-bit | Gives more usable headroom for gain changes and cleanup |
| File type | WAV mono per speaker | Preserves quality and keeps each voice controllable |
| Recording peak | Around -6 dBFS | Leaves space for EQ, compression, and loudness matching |
| Master bus | Dedicated processing bus | Keeps global dialogue treatment consistent |
| Backup copy | Raw folder plus working copy | Protects originals if a cleanup pass goes wrong |
Organize before you move a waveform
Naming matters more than people think. Use a consistent pattern for the episode number, speaker, and take, then keep raw media, project files, music, and exports in separate folders. That makes it obvious what's source audio and what's a render, which matters when you need to revisit a line after client feedback.
Back up the raw files before you touch anything. A working copy is not a backup, and a backup you can't identify later isn't much better.
Inside the DAW, use clip gain for rough leveling before plugins, group multi-track dialogue so edits stay aligned, and keep a versioned export trail. That way, if a denoise pass gets too aggressive, you can roll back without rebuilding the whole episode from scratch.
Cleaning the Track Through Noise Reduction and Dialogue Isolation
Noise cleanup works best when you treat it like a layered repair job. Start with obvious defects, then move toward broader cleanup, and stop as soon as the voice starts sounding less natural than the problem you removed.
Remove defects in the right order
The first pass should target transient problems, clicks, pops, clipped edges, and dropouts. Then apply denoising at a low setting. The independent workflow guidance in the brief recommends preprocessing with declick or declip, then low-intensity denoising at about 10–20% where available, followed by a second spectral pass for leftover hum or static, and finally an AI enhancement pass for degraded recordings. Podigy noise reduction techniques
That order matters because broad denoising works better when the track is already cleaner. If you remove artifacts first, the noise reducer doesn't have to guess what's speech and what's damage. It makes fewer mistakes, and the voice keeps more of its natural texture.
Use EQ for steady problems before you lean on broadband tools
Persistent hum, hiss, and low rumble are often better handled with narrow EQ cuts than with stronger denoise settings. EQ is cleaner when the issue sits in a predictable band, because you're removing one offender instead of asking a processor to rewrite the whole track. In practice, that means checking for mains hum around 50/60 Hz, rumble below 80 Hz, and hiss above the high end before reaching for the heaviest processing.
If the recording has dialogue buried under room noise or remote-call artifacts, dialogue isolation can help, but only if you keep the settings conservative. Push it too hard and you get metallic edges, thinning room tone, and the kind of speech that sounds “clean” in isolation but brittle in context.
Keep one ear on intelligibility and the other on realism. If the voice starts sounding disconnected from the room, you've gone too far.
Reserve reverb repair for recordings that truly need it
De-reverb can rescue a bad room, but it can also make a voice feel papery and detached. That's why I only use it when the room sound is the primary problem, not as a default step. For a lot of interview edits, a gentle cleanup pass plus careful level control is better than trying to force a studio sound onto a living-room recording.
A current benchmark standard for speech editing is also moving toward measurable quality checks instead of pure listening tests. SpeechEditBench evaluates whether systems preserve lexical content while improving acoustic quality, and its acoustic-editing task requires positive improvement in overall quality and background quality. The benchmark uses 500 acoustic samples split evenly across English and Chinese, with noisy and reverberant material built from MUSAN noise and synthetic room impulse responses, which reflects the same challenge editors face when they try to improve clarity without creating artifacts. SpeechEditBench dataset
Shaping Voice With EQ, Compression, and Leveling
Once the track is clean enough to trust, shaping the voice becomes a matter of restraint. The goal isn't to make every speaker sound identical, it's to make each one easy to follow on headphones, laptop speakers, and a phone without flattening the personality out of the recording.
Start with small EQ moves
A high-pass filter around 80 to 100 Hz usually removes low rumble and proximity buildup without making the voice thin. If the recording feels muddy, a gentle cut in the 250 to 400 Hz zone often clears space without changing the character of the speaker. For presence, a broad, modest lift in the 2 to 4 kHz range usually does more good than a surgical boost.
Broad Q values are the safer default. Narrow cuts are useful for a specific resonance or room ring, but if you stack narrow moves everywhere, the track starts sounding carved instead of balanced. That's the point where people hear the processing before they hear the person.
Use compression to steady the delivery, not flatten it
Compression should even out level swings, not erase dynamics. A practical starting point is a threshold around -20 dB, a ratio between 2:1 and 3:1, attack around 10 to 20 ms, and release around 100 to 150 ms. That gives consonants room to speak while smoothing peaks that would otherwise jump out of the mix.
| Control | Starting Point | Purpose |
|---|---|---|
| High-pass filter | 80 to 100 Hz | Removes rumble and proximity buildup |
| Low-mid cut | 250 to 400 Hz | Reduces muddiness |
| Presence boost | 2 to 4 kHz, broad | Improves intelligibility |
| Compression threshold | Around -20 dB | Catches louder peaks |
| Compression ratio | 2:1 to 3:1 | Smooths level variation |
| Attack | 10 to 20 ms | Preserves consonant impact |
| Release | 100 to 150 ms | Avoids pumping and breathing artifacts |
Level for consistency, not punishment
For stereo podcast delivery, a common loudness target is around -16 LUFS, with peaks near -6 dBFS before final limiting. A limiter or loudness meter keeps the export stable, but it shouldn't be used to rescue a wildly uneven edit. If the voice is already solid, don't keep adding gain just because you can.
Solo narration that's already clean may need very little of this. The same goes for a multi-host show where the difference between voices is part of the format. In those cases, minimal processing usually sounds more honest than trying to make every speaker fit the same mold.
Editing for Pacing, Clarity, and Listener Retention
Pacing edits are where a podcast starts feeling deliberate. This is also where many editors get too aggressive, because it's tempting to chase every filler word and every pause until the conversation loses its breath.
Cut in the order that preserves flow
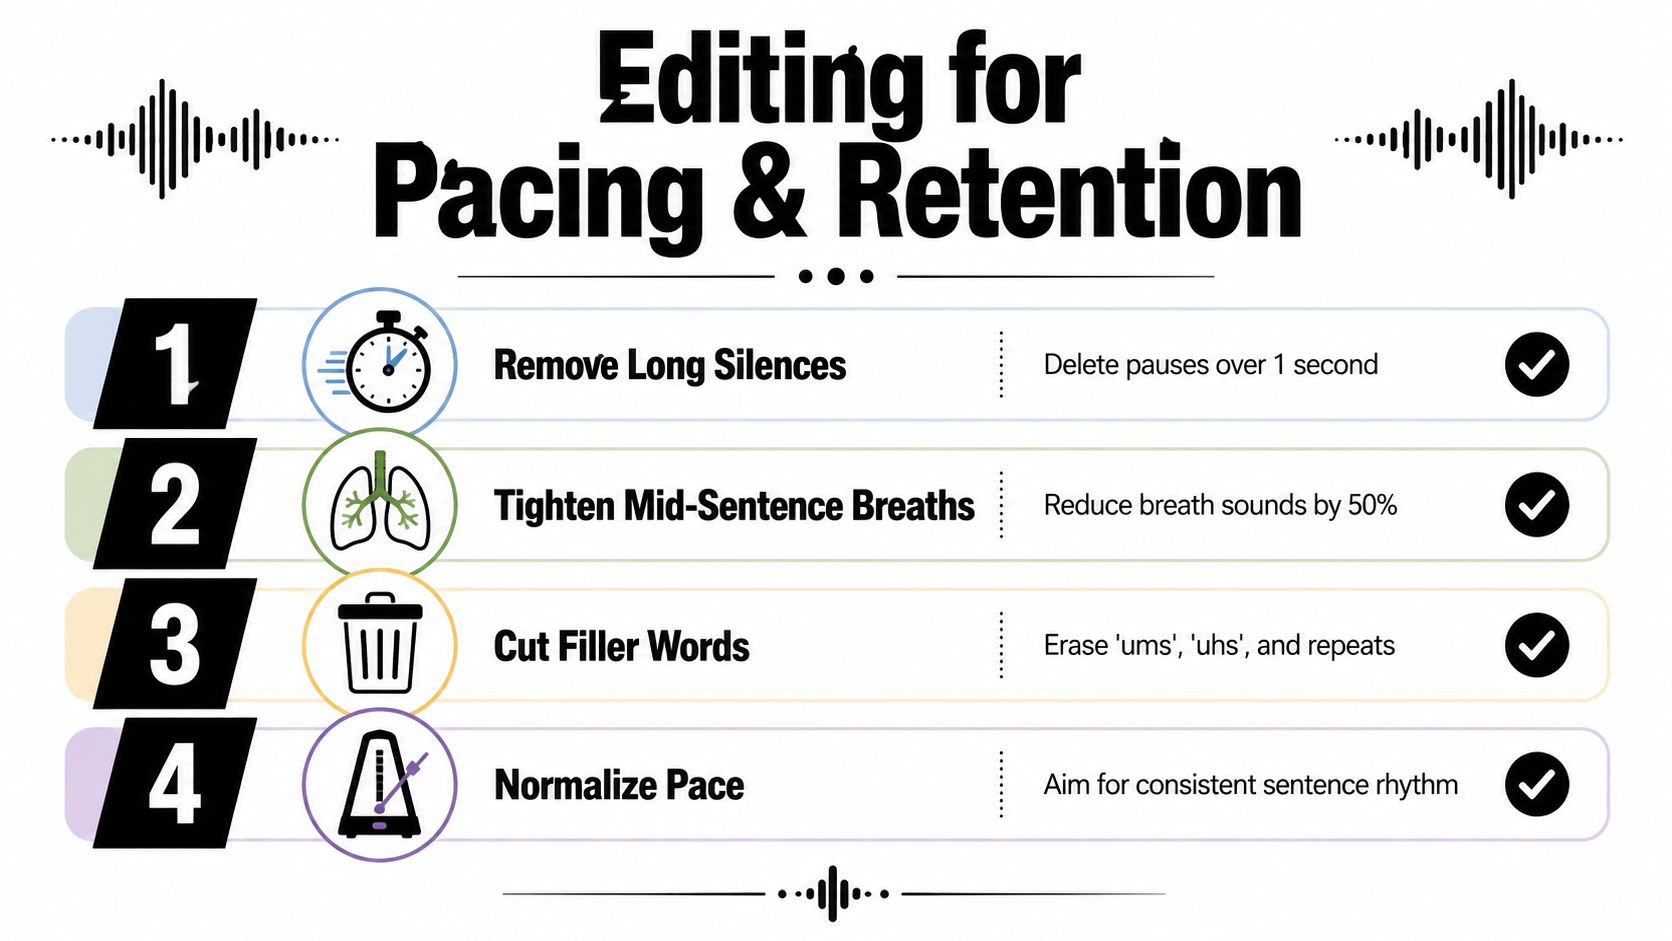
Start with long silences and dead air. Then tighten breaths that interrupt the sentence. After that, remove filler words, false starts, and repeated phrases. Save tangents and long detours for a judgment call, because some of them are valuable context even if they aren't efficient.
Solo narration tolerates a harder trim. Interview dialogue usually doesn't. The overlap, interjections, and small hesitations in an interview often carry rapport, and if you cut them all away, the hosts can sound like they're reading from a script rather than talking to a person.
Use transcript editing where it helps, not where it hides the audio
For long episodes, cutting to a transcript can save time on content changes and filler cleanup. It's useful when the structure matters more than the waveform, especially for interviews with a lot of speaking turns. Ripple delete and grouped clips matter here, because they keep multi-track sessions aligned while you remove dead air.
Silence padding also deserves attention. Gaps that are too short can sound glitchy on headphones, while longer spaces can keep the rhythm human. In practice, a small pad between breaths and between thoughts usually works better than cutting every pause to zero.
If an edit sounds tidy but makes the speaker sound impatient or unnatural, the pacing is wrong.
The retention goal isn't to hit an arbitrary word count. It's to keep the listener oriented. A clean edit that preserves meaning will usually hold attention better than a hyper-trimmed one that makes the conversation feel rushed.
Choosing Between DAW, Transcript, and AI Editing Workflows
The right workflow depends on the episode, not the editor's ego. A music-heavy show, a remote panel, and a solo narration all reward different tools, and trying to force one workflow onto every project usually creates more work than it saves.
Compare the real trade-offs
A DAW such as Adobe Audition, Reaper, Hindenburg, or Logic gives you the most control over clip gain, routing, and detailed processing chains. That makes it the strongest choice for multi-track interviews, music beds, and any episode where timing has to stay precise. The downside is the learning curve, and there's no hiding from it.
Transcript editors like Descript flip the logic. You edit the text, and the audio follows, which makes filler removal and content restructuring much faster. The trade-off is that you're tied to a subscription workflow, and you lose some of the fine-grained control that waveform editing gives you when a line needs surgical cleanup.
AI cleanup tools such as Adobe ClearAudio, Auphonic, and Krisp handle noise reduction, leveling, and dialogue isolation in one pass. They're fast and consistent, and they're also opaque. You can hear the result, but you can't always tell why the model chose one part of the signal over another.
| Workflow | Strength | Weakness | Best For |
|---|---|---|---|
| DAW-based editing | Maximum control over cuts and processing | Slower to learn and slower to use | Multi-track interviews, music-heavy shows |
| Transcript editing | Fast filler removal and content edits | Less audio precision | Talking-head episodes, scripted cleanups |
| AI cleanup tools | Quick, consistent first-pass cleanup | Limited transparency and tweakability | Noisy files, batch processing, tight deadlines |
A practical default works better than a pure ideology
The hybrid approach usually wins. Run AI cleanup and leveling first if the source needs a fast, consistent baseline. Then move into a DAW or transcript editor for pacing, structure, and the edits that shape the episode. That gives you the speed of automation without giving up control where it counts.
A browser-based tool such as ClearAudio can fit that middle ground when you need to clean hum, hiss, room echo, or dialogue from audio or video before you do the final structural edit. It's one option among several, but the useful part is the workflow, upload, specify what to keep, and get a cleaned file you can refine afterward.
For creators repurposing clips to social platforms, it also helps to look at optimize sound for Twitch clips so the cleanup choices make sense beyond the full episode. The main question is always the same, how much control do you need over the audio after the first pass?
Decide by episode length, team size, and deadline
Small teams usually care most about turnaround and consistency. Larger productions care more about revision control and fine detail. If the episode is short and the source is decent, a transcript or DAW edit may be enough. If the file is noisy, long, or mixed with video, AI cleanup first often saves the most time.
Export Settings, Platform Optimization, and Final Quality Checks
Export is where a lot of good work gets wasted. If the file format, loudness, or tagging is wrong, listeners hear the mistake before they hear the show.
Match the export to the destination
For Spotify and Apple Podcasts, a common distribution target is 128 to 192 kbps MP3 at 44.1 kHz. Keep an archival master in WAV or FLAC at 24-bit/48 kHz, and use AAC 256 kbps for YouTube uploads. For social clips, square or vertical 1080p exports with a short-term target around -14 LUFS keep the audio closer to platform expectations.
| Platform | Format | Bitrate | Loudness Target | Notes |
|---|---|---|---|---|
| Spotify | MP3 | 128 to 192 kbps | Around -16 LUFS integrated | Keep file size manageable |
| Apple Podcasts | MP3 | 128 to 192 kbps | Around -16 LUFS integrated | Add artwork and metadata |
| YouTube | AAC | 256 kbps | Platform-friendly loudness | Use for video uploads |
| Social clips | Square or vertical video | 1080p | Around -14 LUFS short-term | Prioritize speech clarity |
Check the details people forget
Tag the file with ID3 metadata, add chapter markers if your host supports them, and size the artwork correctly for Apple Podcasts, which requires 3000×3000 minimum. Then listen to the whole file on earbuds, speakers, and a phone. The goal is to catch the weird stuff, a clipped laugh, a room tone jump, a gap that feels too tight, or a loudness mismatch that only shows up outside the studio.
A final checklist keeps the last pass honest.
- Loudness: confirm the integrated level sits near the target you chose.
- True peak: keep it below -1 dBTP.
- Master output: make sure there's no clipping.
- Silence gaps: trim any obvious dead air to under one second where appropriate.
- Room tone: keep it consistent so edits don't pop out.
- Playback test: check earbuds, speakers, and a phone before publishing.
Export once for archive, then derive the platform versions from that master. Re-rendering the whole session repeatedly is how tiny differences creep in, and those are the differences people hear when the episode goes live.
If you want a faster cleanup pass before the detailed edit, ClearAudio can remove noise, hum, hiss, and room echo, isolate dialogue, and handle audio or video in the browser without a complicated setup. Visit ClearAudio and see whether it fits the first pass in your own podcast workflow.