You press play on an interview and hear it immediately: the guest's loudest words crackle, the room seems to slap back after every sentence, and a constant electrical buzz sits underneath everything. You try normalizing the file, then noise reduction, then more noise reduction. The recording sounds quieter, but the consonants have vanished and the transcript is worse than the original.
That's the common failure pattern. Distorted audio isn't one problem, so it can't have one universal fix. Clipping, microphone overload, hum, hiss, room echo, and speech mixed with music each damage a recording differently. The right workflow starts with identification, then applies the least destructive repair that addresses the actual failure.
Table of Contents
- Why Distorted Audio Happens and Why Generic Fixes Fail
- Diagnose the Distortion Before You Touch a Single Knob
- Quick Field Fixes Versus Advanced Software Repair
- A Step-by-Step ClearAudio Workflow for Speech and Music
- Avoiding Overprocessing and the Intelligibility Trap
- Preventing Distortion Before It Happens
Why Distorted Audio Happens and Why Generic Fixes Fail
A podcast host once sent me an interview that sounded “too quiet” in the editor. They normalized it before checking the waveform, which pushed already-clipped peaks forward and exposed brittle high-frequency artifacts. A broad noise reducer then made pauses smoother while stripping detail from the words. The transcript tool struggled because processing had removed speech cues that mattered more than the background noise.
Normalization changes level. It cannot rebuild a waveform that has already been cut off.
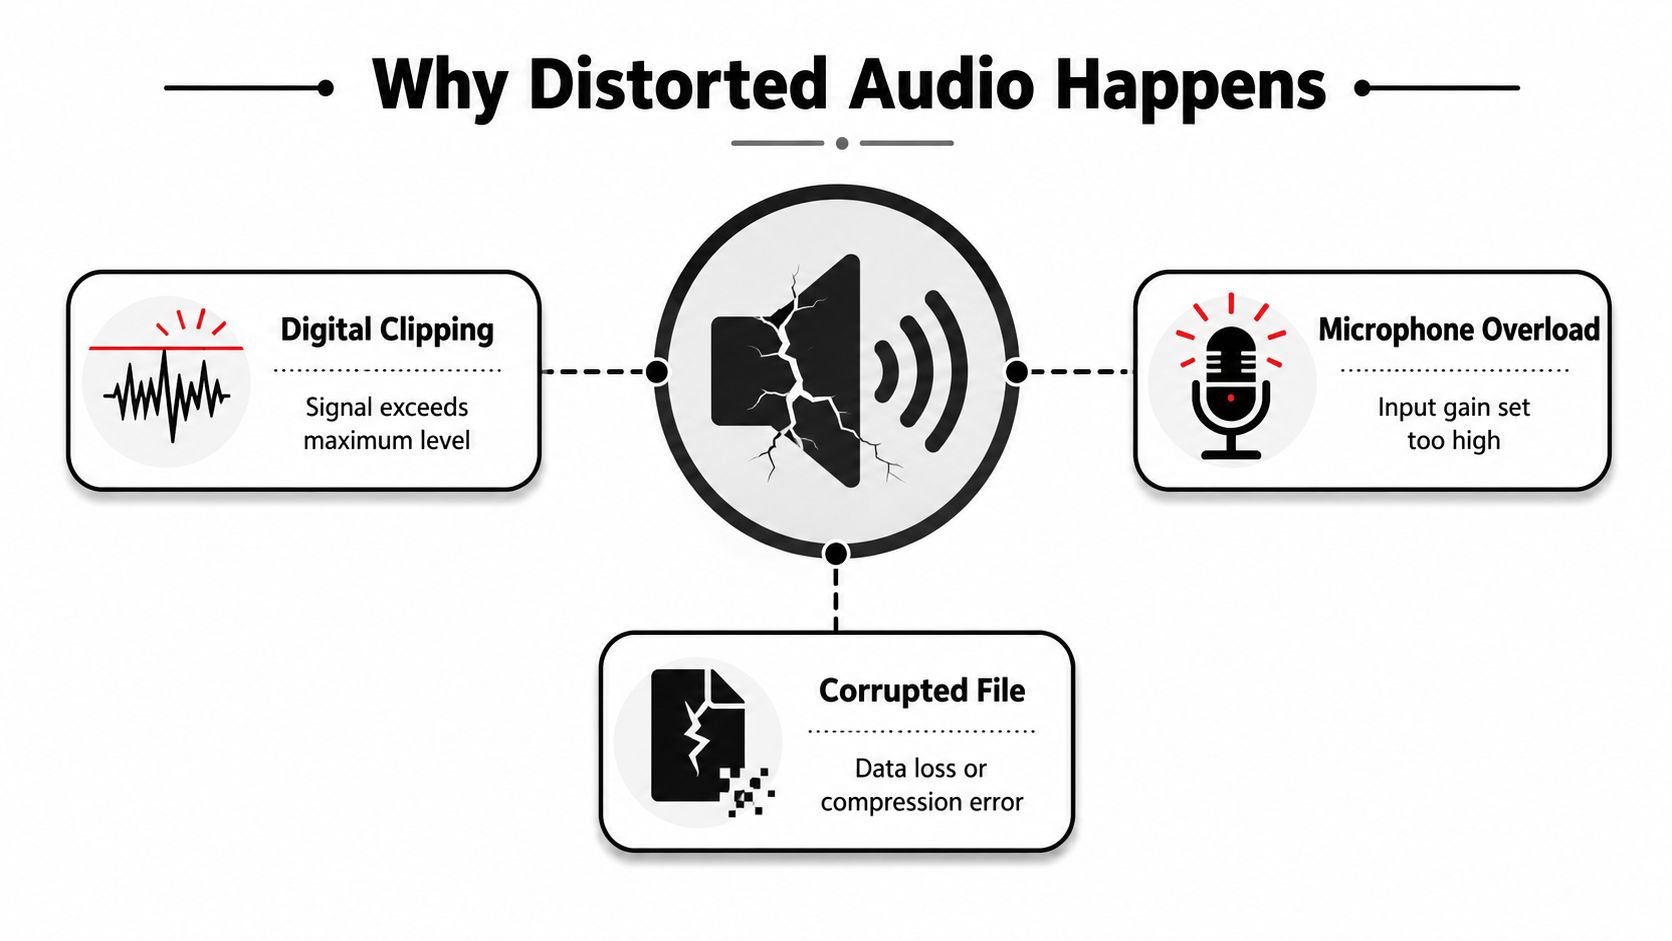
Distortion has several failure modes
Peak clipping occurs when a signal exceeds the available digital or analog level. The waveform tops flatten, producing crackle, harsh harmonics, and damaged consonants. Declipping can estimate the missing peaks, but it is reconstruction, not a perfect recovery of the original performance.
Center clipping removes part of the waveform around its midpoint instead of cutting only the extremes. Research on the effects of amplitude distortion distinguishes the effects clearly: peak clipping may remain relatively intelligible in quiet conditions, while center clipping can damage speech more severely, especially with noise present. Gain reduction alone will not correct either form.
Hum and hiss are usually additive noise problems. Hum tends to occupy a stable, low-frequency electrical range. Hiss spreads across a wider band. Suppression can reduce both, but aggressive settings may erase breaths, fricatives, ambience, and the natural edge that keeps speech understandable.
Room echo comes from reflections, not low volume. A denoiser may lower the room tone while leaving delayed reflections intact. Dialogue isolation or dereverberation better matches that failure mode, though heavy processing can make voices phasey or unnaturally dry.
Working principle: A cleaner waveform is not automatically a clearer recording. Judge the repair by words, transients, and natural tone, not by silence between phrases.
The same distinction applies before recording. If you raise the level of a video or voice track, use a workflow designed to avoid distortion when amplifying video, rather than making an already-clipped file louder after the damage is done.
Audio repair also rests on older signal-processing work, not only current AI tools. This technical history places browser-based restoration within that broader development of digital signal-processing methods. The practical lesson is simple: identify the failure mode first, then choose a repair that targets it. A tool built for hiss will not reconstruct clipped peaks, and a declipper will not remove room reflections.
Diagnose the Distortion Before You Touch a Single Knob
Start with the ears, not the repair panel. Scrub through the loudest words, quietest pauses, and any transitions where the recording changes character. Write down the dominant symptom in plain language, such as “crunch on peaks,” “steady hum,” or “slap-back echo.”
Use a fast listen-and-label routine
Listen to the peaks. If loud syllables crackle or sound squared off, suspect clipping or microphone overload. Microphone overload often begins before the recorder receives the signal, so turning down the clip afterward won't restore the lost shape.
Listen during pauses. A steady low buzz points toward hum. A soft, broadband fizz points toward hiss. If the noise rises and falls with the voice, you may be hearing processing artifacts or bleed rather than a fixed noise floor.
Listen after words. A short room tail, slap, or repeated reflection suggests echo. The voice may sound distant even when the background itself isn't loud.
Listen for competing material. Music underneath speech, another speaker, or traffic mixed into the same frequency range requires separation or context-aware enhancement. A simple gate won't know which part is important.
Confirm the label visually
A waveform with repeatedly flat-topped peaks supports a clipping diagnosis. A spectrogram can reveal a persistent horizontal line associated with hum, while hiss appears as a broad raised noise floor. Echo often leaves visible decay trails after speech, although the display should support what you hear rather than replace it.
Your diagnosis should fit in one sentence:
“The interview has clipped dialogue, steady electrical hum, and moderate room echo.”
That sentence is useful because it defines the target. It also prevents the most expensive mistake in cleanup, applying a general noise preset to every defect at once.
Don't repair the entire file immediately. Select a representative phrase containing the worst damage, process that short passage, and compare it with the original at matched loudness. If the repaired sample sounds impressive only because it's louder or quieter, the comparison isn't telling you enough.
Quick Field Fixes Versus Advanced Software Repair
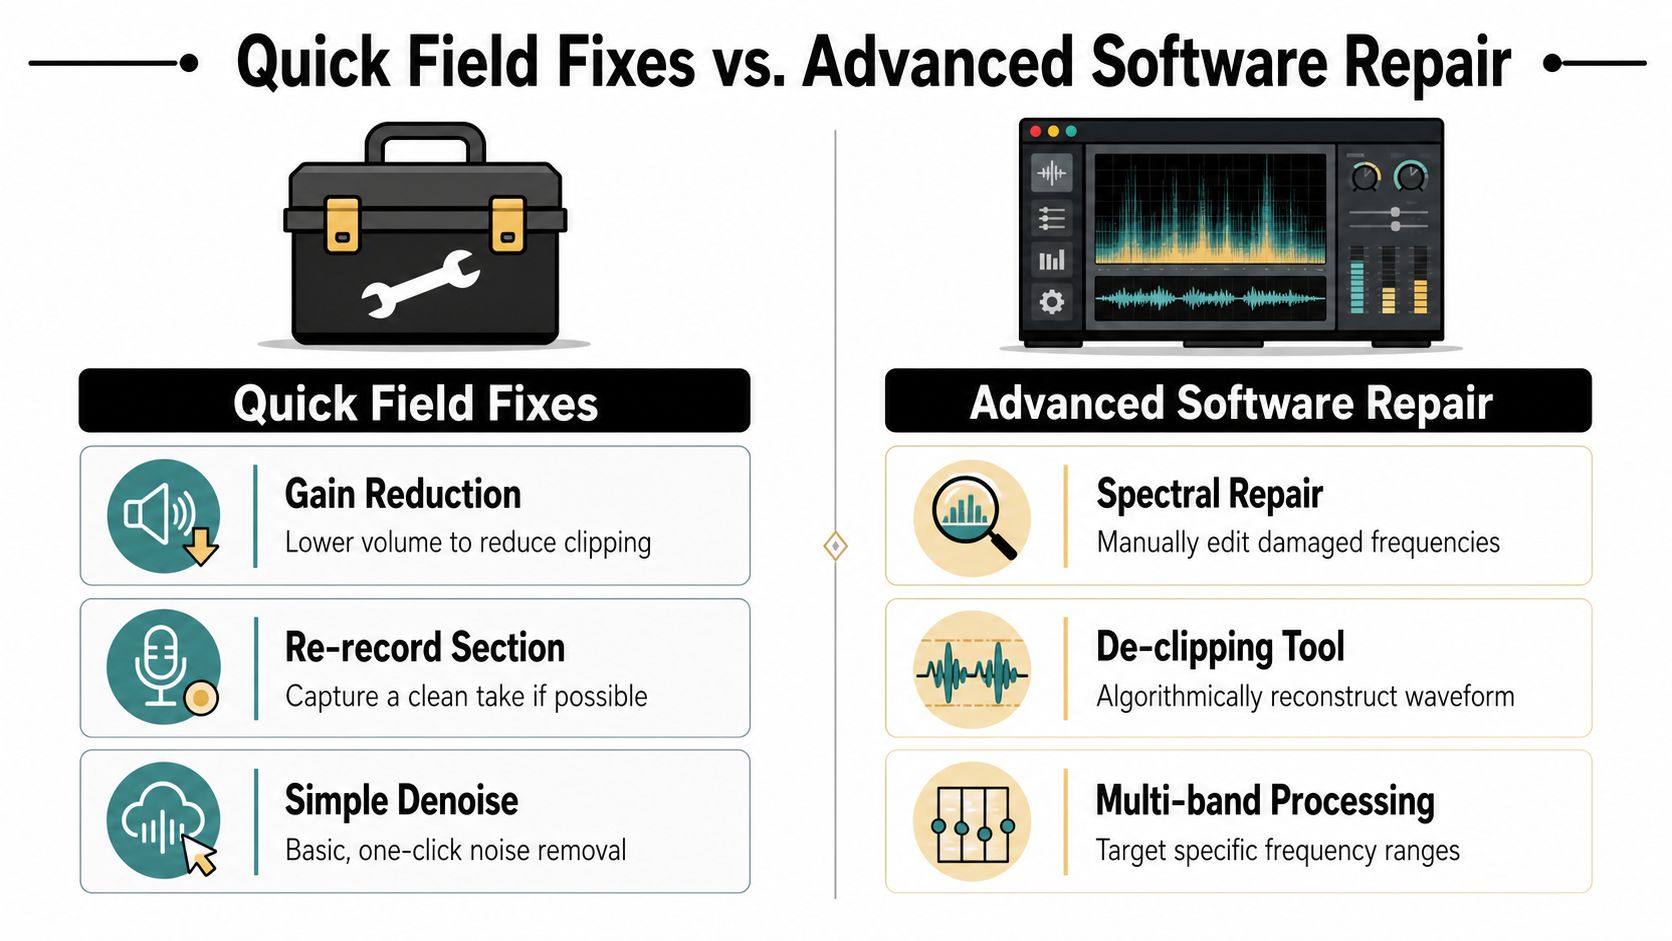
The quick path is appropriate when the speaker can be reached, the deadline is tight, or the damage affects only a short passage. The advanced path makes more sense when the recording is unique, the failure is layered, or the file must support transcription and editing as well as human listening.
Choose the quick field path when the source can be changed
Lowering gain helps only when the problem is excessive level before a later stage. It won't reverse digital clipping already printed into the file, but it can prevent additional overload while you capture a replacement.
Re-recording a sentence is often more convincing than spending an hour reconstructing it. If the speaker is available, replace the worst line and preserve the original for reference. For a remote interview, ask for a clean retake in the same microphone position and match the surrounding room tone as closely as possible.
Simple operating-system or meeting-app noise suppression can produce a usable call quickly, but it may smear consonants and musical detail. Use it for internal review or an urgent reference, not automatically as the final master.
If you're capturing system sound on a Mac, fix the routing before recording rather than trying to separate a broken capture later. A guide to how to record Mac audio can help you verify that the intended source is being recorded.
Use advanced repair when the file is irreplaceable
A spectrum editor lets you isolate a narrow hum, remove a transient artifact, or interpolate a damaged frequency region. A declipper can estimate flattened peaks. Dialogue isolation can separate speech from music or environmental sound, while multiband processing can treat low-frequency hum and high-frequency hiss independently.
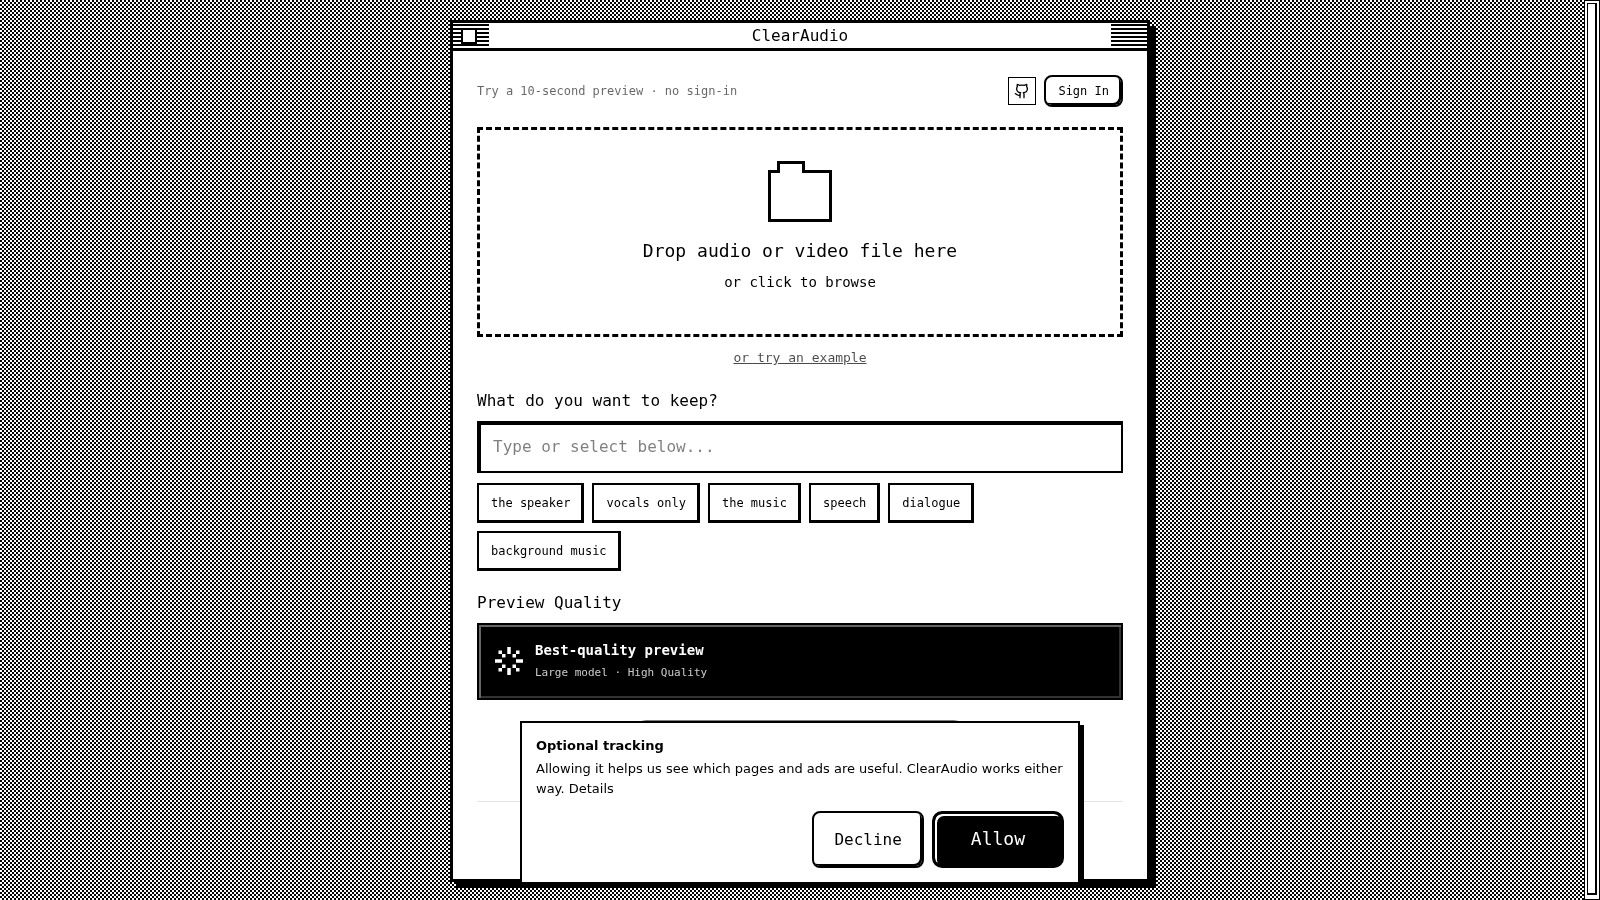
ClearAudio is one browser-based option for prompt-driven cleanup. It accepts audio or video, lets you specify what to retain, including a speaker, vocals, music, speech, dialogue, or background music, and provides quality modes ranging from Small and Base to PRO Large and PRO Large-TV. Its workflow targets noise, hum, hiss, room echo, dialogue isolation, and intelligibility without requiring a desktop restoration setup.
Know when repair is the wrong job
Re-recording is usually better when a short line is available, clipping is severe across every syllable, or competing voices overlap the target completely. Repair is a rescue technique, not a time machine. Keep the original file, render to a new version, and stop when further processing changes the speaker's identity more than it improves comprehension.
A Step-by-Step ClearAudio Workflow for Speech and Music
Begin with the original file, not a version that has already been normalized, compressed, or processed through several noise tools. Create a working copy and use a filename that records the take and intended treatment. That makes it possible to compare decisions rather than relying on memory.
Upload and define what must survive
Drag the file into ClearAudio, browse to it, or use an example if you're learning the interface. Before writing a prompt, decide whether the output should prioritize dialogue, a single speaker, vocals, music, or background music. Separation and cleanup serve different purposes, and the instruction should identify the element you want to protect.
A vague request such as “make this sound better” gives the processor too much freedom. Describe the defect and the acceptable result instead:
- Interview speech: “Remove room echo and hiss from interview dialogue, keep the voice natural and avoid metallic artifacts.”
- Field recording: “Reduce steady hum and broadband hiss from spoken narration, preserve consonants and outdoor ambience.”
- Music: “Reduce distortion around the vocal peaks, keep the balance and natural vocal tone.”
- Mixed speech and music: “Prioritize the spoken dialogue, reduce competing background music without making the voice hollow.”
The prompt should name what is wrong, what to keep, and what not to introduce. “Natural tone” and “avoid overprocessing” are useful constraints because maximum suppression isn't the same as maximum clarity.
Select quality for the job
Use Small when you need a quick diagnostic preview. Base is a practical starting point for ordinary speech cleanup where speed and quality both matter. Move to PRO Large for difficult restoration or music stems, and use PRO Large-TV when the source is a video file and you need the processing mode intended for that material.
Don't choose the heaviest mode before testing the diagnosis. Previewing a representative passage first exposes bad instructions early, and it lets you hear whether the system is attacking the defect or the voice itself.
After the first render, compare the processed result with the original at similar loudness. Listen to breaths, “s,” “f,” and “t” sounds, low vocal body, and the decay after each phrase. For music, check whether cymbals become watery, bass loses weight, or the stereo image narrows.
A short preview is useful, but the final check must include the whole file. Repair can behave differently when the speaker gets louder, music enters, or the room changes.
Use this walkthrough as a visual reference before trying your own file:
Export without creating a second failure
Before export, lower the output if reconstruction has made peaks aggressive. Never judge the finished file only through a loudness increase, because clipping can return during a final gain stage or video export. Keep the repaired version separate from the source, then check it in the environment where people will hear it, including headphones and ordinary speakers.
Avoiding Overprocessing and the Intelligibility Trap
A denoiser can make a voice appear cleaner while making it harder to understand. The usual failure is excessive reduction around consonants and sibilants, where speech carries much of its identity. The listener hears fewer distractions but also receives less word information.
For speech enhancement, STOI is designed to evaluate intelligibility and correlates with subjective word and sentence recognition scores. A defensible workflow uses a clean or noisy reference pair when available, applies the enhancement, then compares the result with STOI and listening tests. The speech-enhancement survey also emphasizes that methods can behave differently across noise sources and signal conditions.
Validate the words, not just the texture
Field evidence shows that careful enhancement can produce meaningful intelligibility gains, but results depend on the environment. One binaural-hearing-aid study reported a mean improvement of about 15% at -8 dB SNR, while another field study reported speech intelligibility increasing from 44.8% to 67.7%, a 22.9 percentage-point gain, with an additional 18.3 percentage-point gain in another condition. The binaural speech-enhancement study supports a practical conclusion, tune processing for the listening situation rather than expecting one setting to work everywhere.
If the file feeds transcription, run a short transcription round-trip before and after processing. A voice can be pleasant for a person yet still confuse an automated recognizer, especially after spectral damage or aggressive isolation. Research on degraded speech perception shows why “good enough to listen to” and “good enough to transcribe” aren't interchangeable goals. This analysis of degraded speech intelligibility is useful context for that distinction.
Stop rule: Stop processing when the original problem is no longer distracting. Don't keep turning the reduction upward just because the noise floor is still measurable.
Never chain two broad noise reducers without a direct comparison against a single-pass result. Each stage can remove more ambience, smear transients, and create pumping. If the first pass leaves a problem, change the diagnosis or use a narrower treatment instead of automatically adding another global processor.
Preventing Distortion Before It Happens
The cheapest repair is a better recording. Set input gain conservatively and leave 10 to 15 dB of headroom before the loudest expected passage. Prevent level problems at capture rather than treating volume as a substitute for clean audio.
Monitor through headphones while the speaker delivers the loudest line. Watch the meter, but trust your ears too. A microphone capsule or preamp can overload before the recorder's display shows an obvious failure. Use a pop filter for plosive blasts, and move the microphone slightly off-axis to reduce direct bursts of air without making the speaker change delivery.
Match each habit to a failure
- Prevent clipping: Set the input before the take and leave room for laughter, emphasis, and unexpected peaks.
- Prevent hum: Remove unnecessary power connections, keep audio cables away from likely electrical sources, and test the complete signal chain before recording.
- Control hiss: Use a healthy input level without overdriving the preamp, then avoid adding unnecessary gain during editing.
- Control echo: Place the microphone close enough to favor the voice, and choose the quietest, least reflective position available.
- Prepare restoration: Capture room tone and a short silence sample for a consistent cleanup reference.
A short test phrase can expose problems before the actual performance. Listen back and confirm that the microphone, routing, and monitoring are correct. Keep project files organized by speaker, take, and version. For interviews and field work, record extra room tone at the start, then preserve the untouched source after exporting the cleaned version.
These habits target different failure modes. Clipping needs headroom, hum needs cleaner electrical routing, hiss needs controlled gain, and echo needs better microphone placement. Applying the wrong fix can make the recording less usable, so diagnose the defect before adding processing.
ClearAudio can process uploaded audio or video when a damaged take needs prompt-based cleanup, separation, or intelligibility-focused restoration. Visit ClearAudio, give the diagnosed file a specific instruction, and compare the result with the original before committing to the export.