You've finished an interview, location shoot, or voice recording, and the important take sounds wrong. A steady hiss sits under every sentence. An air conditioner adds a low hum. The room makes each word bloom into an indistinct echo. You can hear what the speaker said, but the recording doesn't yet sound ready for an audience.
Professional audio restoration can often make that material usable without making it sound artificial. The aim isn't to erase every trace of the recording environment. It's to remove distractions, protect the speaker's character, and leave enough natural ambience that the result still feels like a real performance in a real place.
That distinction matters because restoration can't recreate information that was never captured. It can reduce noise, control hum, soften clicks, improve separation, and sometimes recover clipped or masked speech. It can't reliably reconstruct every missing consonant, turn a distant microphone into a close one, or make severe overlapping sounds disappear without tradeoffs.
The practical standard: Stop processing when the listener understands the message more easily, not when the noise meter reaches an impressive-looking value.
This guide follows that preservation-first approach. You'll learn how the main restoration tools differ, how to build a repeatable dialogue workflow, when AI automation is useful, when spectral editing is safer, and how to judge results with listening effort and intelligibility rather than volume alone.
Table of Contents
- Introduction What Great Restoration Actually Sounds Like
- How Professional Audio Restoration Works
- Step by Step Restoration Workflow for Clean Dialogue
- Choosing Between Automated AI Tools and Manual Processing
- How to Evaluate Results Without Trusting Your Ears Alone
- Common Pitfalls That Make Restored Audio Sound Worse
- Before and After Scenarios With Recommended Settings
- Conclusion Your Preservation First Restoration Plan
Introduction What Great Restoration Actually Sounds Like
A producer hears the problem during the first review. The guest's answer is excellent, but a refrigerator-like hum runs beneath it. A filmmaker finds that the best take was recorded beside a hard wall, so the dialogue carries a long reflection. A musician opens an old transfer and discovers hiss, clicks, and uneven tonal balance surrounding a performance that still has real value.
The first instinct is usually aggressive cleanup. Push the denoiser harder. Add another pass. Remove the room completely. If a little restoration helps, more must help more.
That instinct creates the familiar “processed” voice. Sibilants turn into splashes. Sustained vowels develop a watery texture. Background ambience pumps in and out between phrases. The recording may be quieter, but the speaker sounds less believable and the audience works harder to stay engaged.
Professional restoration sounds more restrained. The voice remains recognizably the same person. Consonants stay crisp without becoming sharp. Pauses don't collapse into digital silence. A listener notices the story, not the repair.
What restoration can change
A restoration engineer can target problems according to their behavior in the signal:
- Broadband noise, such as hiss, fans, and general room noise, can often be reduced with a noise profile or learned model.
- Tonal problems, such as electrical hum, need a narrow corrective process rather than a broad denoiser.
- Clicks and crackles are short events that spectral repair or dedicated de-click processing can address.
- Reverberation is a spatial effect, so reducing it requires a different approach from removing steady noise.
- Clipping and missing detail may be partly repaired, but aggressive reconstruction can invent audible texture.
AI tools help when the task is common, repetitive, and clearly defined. A human still needs to decide what belongs to the recording, what harms comprehension, and when the algorithm has started changing the voice.
The modern history of this work includes a documented turning point in 1965, when Ray Dolby invented electronic noise-reduction circuitry for tape hiss; by 1967, major labels including RCA and MCA had adopted it, and Dolby technology later appeared in widely used consumer formats. The audio restoration market history describes more than 850 million Dolby-licensed products sold to date, a reminder that controlling unwanted sound has long involved both engineering and judgment.
How Professional Audio Restoration Works
At its simplest, restoration separates a wanted signal from unwanted material. Think of a dirty window. Noise reduction cleans the glass so you can see the subject more clearly. It doesn't repaint the subject, replace the scenery, or change the shape of the room behind it.
The analogy breaks down when several sounds occupy the same frequencies. A voice and a passing vehicle may overlap. A room reflection may arrive only milliseconds after the direct voice. An algorithm has to estimate which parts belong to speech and which parts don't, and every estimate can remove something useful.
Match the tool to the sound
Broadband denoise works on relatively continuous material, such as tape hiss, computer fans, or air-conditioning noise. It compares the unwanted sound with the voice and attenuates areas that resemble the learned noise. The more the noise changes during the recording, the harder the decision becomes.
De-hum targets stable tonal components and their harmonics. A low electrical tone may be obvious during pauses and less obvious under speech, but it still needs a frequency-specific solution. Broad denoising can damage the voice while leaving the hum partly intact.
De-essing controls excessive energy from consonants such as “s” and “sh.” It's not general noise reduction. Used too strongly, it makes speech dull or gives the mouth a lisp-like character.
De-reverb estimates reflections and reduces their contribution. It can improve dialogue recorded in a hard room, but it can also create hollow or phasey artifacts when the direct voice and reflections are difficult to distinguish.
Declipping attempts to reconstruct peaks that exceeded the recording system's limit. It may help mild distortion, while severe clipping can leave too little reliable information for a natural repair.
Stem separation isolates elements such as vocals, music, speech, or background material. It's useful for remixing and selective cleanup, but separation artifacts can appear around transients, breaths, and overlapping sounds.
Traditional spectral editing gives you a visual map of frequency over time. You can select an isolated click, a short vehicle burst, or a narrow hum and repair it without applying a broad effect to the entire file. Modern AI separation is faster for complex material, especially when you need to process many files, but it still benefits from conservative settings and human review.
The commercial software category reflects that expanding range of use. One industry estimate valued professional audio restoration software at about USD 900 million in 2023 and projected USD 2.5 billion by 2033, while another estimate placed the broader restoration services market at USD 0.8 billion in 2025 and projected USD 1.3 billion by 2034. The same market source identifies noise reduction as 28.5% of service share. These figures are estimates from industry market reporting, not a reason to process every recording aggressively.
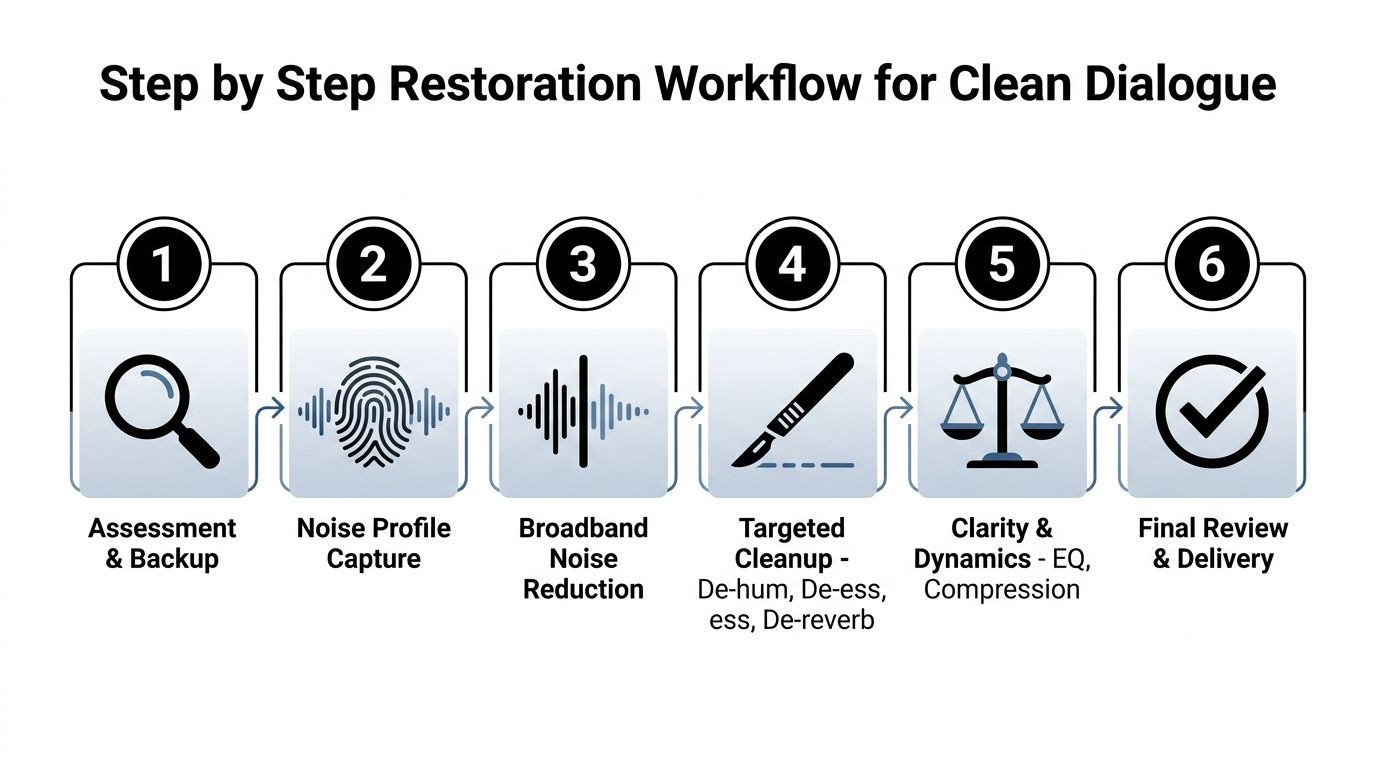
Step by Step Restoration Workflow for Clean Dialogue
Start by duplicating the original file and labeling the working copy. Restoration is an editing process, so you need a clean way back if a later decision makes the dialogue worse. Listen through the complete recording before touching a control, and write down the problems in the order a listener experiences them.
1. Assess before processing
Identify whether the main issue is hiss, hum, room reflection, traffic, rustle, clipping, inconsistent level, or several problems at once. Check the pauses as well as the words. A noise that seems harmless beneath speech may become distracting when the speaker stops.
Choose a short passage containing representative speech and problem areas. Use it for previews, but review the full file after every important change because a setting that helps one sentence may damage another.
2. Remove the broad problem gently
For steady background noise, capture a noise profile if your tool supports one. Apply a light reduction pass, bypass it at matched loudness, and listen for consonant texture, breaths, and sustained vowels. Two restrained passes can be safer than one extreme pass, but stacking processors blindly can also multiply artifacts.
A prompt-based browser workflow can fit here when you need to specify what should remain, such as dialogue, speech, vocals, or background music. ClearAudio supports uploaded audio or video, several quality modes, and advanced controls for users who need more detailed adjustments. Treat that type of tool as an initial separation or cleanup stage, not as permission to skip the review.
3. Make targeted repairs
After broad noise reduction, address specific faults. Use a notch-style de-hum process for a tonal electrical problem, a de-clicker for isolated digital ticks, and spectral repair for an event that appears only briefly. Apply de-reverb carefully. If the room sound is part of the scene, reducing it completely can make the dialogue feel disconnected.
4. Shape clarity only after repair
Use EQ to correct tonal imbalance rather than to disguise unresolved noise. Compression can make a quiet speaker easier to follow, but it also raises room tone and unwanted details. Gain staging matters here. Compare the restored and untreated versions at similar perceived volume so the louder file doesn't win by default.
5. Review in context
Listen through headphones, nearfield speakers, and the actual delivery environment when possible. Check the beginning and end of phrases, edits between takes, breaths, pauses, and moments where the speaker becomes emotional or louder.
Save the processed version separately and document the chain. A restoration workflow is successful when another editor can understand what changed and reproduce the decision without guessing.
Choosing Between Automated AI Tools and Manual Processing
Automated AI tools and manual spectral repair solve different workflow problems. AI is like a skilled assistant who can sort a large pile quickly. Spectral editing is like using a fine brush on one damaged area. Neither approach is automatically more professional.
AI cleanup is a strong first choice for dialogue recorded with mixed background noise, especially when the task involves many interviews, calls, lectures, or production clips. It can identify speech-like material and reduce competing sound without requiring the operator to draw every repair by hand. Its weakness appears when the source contains overlapping voices, music, abrupt changes, heavy reverberation, or unusual sounds that the model may interpret incorrectly.
Manual repair takes longer, but it gives you local control. You can remove one chair scrape between words while leaving the surrounding ambience intact. You can reduce a narrow whistle without applying the same correction to the entire performance. That precision makes manual work particularly valuable for archival material and irreplaceable takes.
A useful decision matrix
| Project condition | Sensible starting point | Why |
|---|---|---|
| Many similar dialogue files | Automated processing with review | Speed and repeatability matter |
| One important interview | Gentle AI pass, then spot repair | Broad cleanup handles routine noise while manual work protects key phrases |
| Isolated clicks or bumps | Spectral editing | The problem is local and visually identifiable |
| Overlapping voices | Careful separation tests | Isolation may help, but artifacts need close listening |
| Archival recording | Conservative manual workflow | Preservation matters more than a modern, silent background |
| Severe room echo | Compare several methods | De-reverb can improve clarity but may alter timbre |
The right hybrid workflow often begins with automated dialogue isolation, followed by manual spectral repair and modest tonal shaping. That sequence saves time without handing every creative decision to a model.
When comparing restoration products, look beyond a single “remove noise” button. Check whether the tool offers previewing, adjustable quality modes, export controls, project security, batch handling, and a way to preserve the original. For a broader survey before choosing a workflow, this guide to tools for noise reduction and voice cleanup can help you compare categories without confusing a repair tool with a complete mixing environment.
The market's expansion also explains why this decision matters to more creators. Recent industry coverage estimates the AI audio editing and restoration market at $2.02 billion in 2025, with use across podcasting, film, and broadcasting, as reported in this market coverage. More automation increases the need for clear stopping rules, not less.
How to Evaluate Results Without Trusting Your Ears Alone
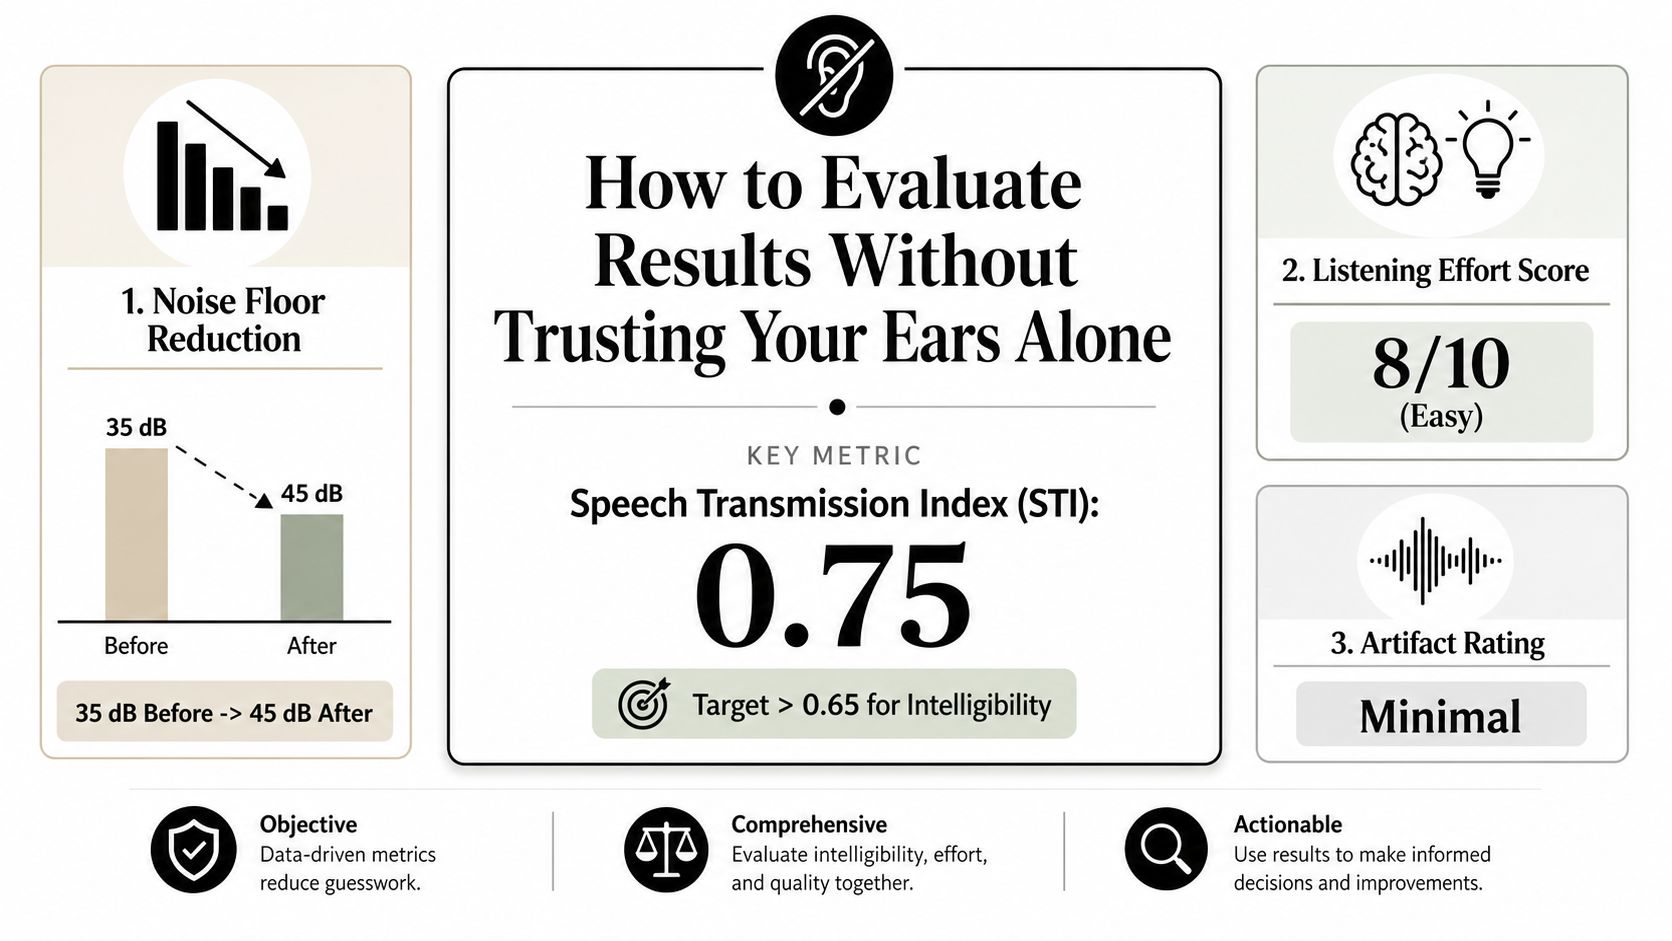
A lower noise floor doesn't automatically mean better dialogue. If the processor removes high-frequency consonants, listeners may understand less even though the waveform looks cleaner. Evaluation needs both objective checks and controlled listening.
Speech intelligibility asks whether people can recognize the words. Listening effort asks how hard they must concentrate to recognize them. Those measures can diverge. A listener may achieve the same word-recognition result but feel less fatigue after noise reduction, or may hear a brighter recording that sounds clearer at first while struggling with its artificial texture.
Research on noise reduction found speech intelligibility remained very high across tested conditions, at 97.7% correct or higher, while processing still produced measurable differences in reaction time and listening effort. The published study on intelligibility and listening effort supports a practical lesson: word scores alone don't capture the whole listening experience.
Run a controlled comparison
Create an A/B pair with matched perceived loudness. Ask a listener to compare the untreated and processed versions without telling them which one is expected to win. Use a short list of questions:
- Can you follow every important sentence?
- Does the voice still sound like the same speaker?
- Do pauses feel natural?
- Does the background change unnaturally between phrases?
- Do sibilants, breaths, and emotional peaks remain believable?
- Would you choose the processed version if it were slightly quieter?
For speech destined for transcription, test difficult words and proper names. For film, listen against the picture and check whether the repaired ambience matches the shot. For podcasts, check transitions between speakers, because inconsistent room tone can be more noticeable than steady noise.
Interpret technical evidence carefully
Speech reception threshold can show whether a listener needs less favorable signal-to-noise conditions to understand speech. A deep-learning study reported median improvements of 0.8 dB for hearing-impaired listeners and 5.7 dB for cochlear-implant users, while normal-hearing listeners worsened by 0.9 dB under the tested conditions. The Frontiers study on deep-learning noise reduction also found predicted gains only within limited input signal-to-noise windows, roughly −8 to +13 dB for one noise type and −7 to +16 dB for another.
Those findings don't provide a universal plugin setting. They show why restoration needs context. A process can help one listener group and harm another, or work in one noise range and fail outside it.
Common Pitfalls That Make Restored Audio Sound Worse
The most common mistake is treating noise as the only thing worth listening for. A voice can be technically quieter and subjectively worse if the processor removes its attack, changes its formants, or leaves a pulsing residue behind.
Mistake one, pushing denoise until silence
Natural recordings contain some ambience. Removing all of it can create unnatural gaps around speech, especially when the recording cuts between locations or takes. Leave a consistent, quiet bed when it helps continuity, and use room tone to smooth edits instead of forcing every pause to digital black.
Mistake two, stacking identical processors
A broadband denoiser followed by another broadband denoiser may attack the same speech detail twice. If you need another pass, reduce its role and listen for cumulative damage. Keep a bypass copy after each stage so you can identify which processor introduced the artifact.
Mistake three, trusting the loudest version
A louder track often appears clearer in a quick comparison. Match levels before judging. If the restored version only wins because it has more gain, the processing may not have improved the actual signal.
Mistake four, ignoring timbre
Listen to vowels, fricatives, breaths, and endings of words. Watery modulation, metallic edges, hollow midrange, and smeared consonants are warning signs that the algorithm is removing parts of the voice along with the noise.
A safer stopping rule: If the remaining noise doesn't interfere with meaning, continuity, or the intended listening environment, leave it alone.
Mistake five, skipping the full-file pass
A preview can hide problems that appear later. Review the complete recording, including quiet sections, loud sections, speaker changes, and every edit point. Save settings and file versions so you can return to the least processed result that meets the delivery requirement.
Before and After Scenarios With Recommended Settings
A podcast interview recorded under an HVAC vent usually benefits from a noise profile and a restrained broadband reduction pass. Follow with a narrow de-hum treatment if a tonal component remains, then use light EQ and compression. The expected improvement is a steadier background and clearer speech, not total silence. If the hum changes with the room or speaker position, manual spot treatment may be safer than one global setting.
Location dialogue with traffic and room echo needs a different chain. Test dialogue isolation first, then apply modest de-reverb and repair obvious passing sounds in the spectral display. Compare short phrases before processing the entire scene. The listener should hear a more direct voice, while enough environmental sound remains to connect the dialogue to the image.
For a music remix, stem separation comes before detailed cleanup. Isolate the vocal or melodic element you need, inspect attacks and sustained notes, and repair obvious separation residue manually. A quick mode can help you audition ideas, while a higher-quality mode is more appropriate for material that will sit exposed in a final mix.
For large collections of calls, demos, or lectures, automation can establish a consistent first pass. Keep the originals, use the same review criteria across files, and escalate only the difficult clips to manual repair. Quality mode should follow the delivery need, not habit.
Conclusion Your Preservation First Restoration Plan
A reliable restoration plan is simple to state:
- Back up the original.
- Identify the actual problem before choosing a tool.
- Apply the lightest useful process.
- Use AI for speed and separation, manual repair for local or irreplaceable damage.
- Match loudness before A/B testing.
- Judge intelligibility, listening effort, continuity, and artifacts together.
- Stop when further cleanup changes the speaker more than it helps the audience.
Professional audio restoration isn't a contest to produce the quietest file. It's a controlled compromise between clarity, natural tone, scene continuity, and production time. The strongest result preserves the evidence of a real performance while removing the distractions that keep listeners from following it.
For a quick starting point, upload a representative clip to ClearAudio, choose what you want to keep, and compare the result against the original before committing to a full batch. Keep the least processed version that meets your delivery needs, then refine only the sections that still cause trouble.
ClearAudio lets you upload audio or video, specify whether you want speech, dialogue, vocals, music, or another element preserved, and process cleanup in the browser with selectable quality modes and advanced controls. Try the preservation-first workflow by visiting ClearAudio, then review the result for intelligibility and naturalness before publishing.