You know the feeling. The script landed, your delivery felt natural, and you finally got through a take without stumbling. Then you hit playback and hear the room instead of just your voice. A fan is sitting under every sentence. The HVAC hum never stopped. The space sounds bigger than it looked. Suddenly the recording that felt finished sounds like a cleanup job.
That's where many begin by searching for how to remove background noise from a voice recording. The trouble is that most advice gives you only one lane. It tells you to use one app, one effect, or one plugin. Real audio work doesn't happen that way. Sometimes the right answer is to fix the room before you record. Sometimes it's a fast AI pass because the deadline is today. Sometimes you need manual control because the recording has hum, hiss, mouth noise, and ugly room reflections all at once.
The best workflow is the one that matches your recording, your skill level, and your timeline. Clean source first. Fast cleanup if speed matters. Surgical tools when quality matters most.
Table of Contents
- That Perfect Take Ruined by Noise
- The Best Fix Is Prevention How to Record Clean Audio
- The Fast Track Method with AI Noise Removal
- The Manual Toolkit Advanced Noise Reduction Techniques
- Beyond Noise Removing Unwanted Reverb and Echo
- Final Polish and Export Best Practices
- Frequently Asked Questions
That Perfect Take Ruined by Noise
The classic version goes like this. A podcaster finishes an interview that won't happen again. A creator nails a voiceover on the first full read. A coach records a lesson late at night when the house is finally quiet enough. On playback, the content is still strong, but the recording has a problem living underneath it. Maybe it's a constant hiss. Maybe it's electrical hum. Maybe the room throws your words back at you and everything sounds distant.
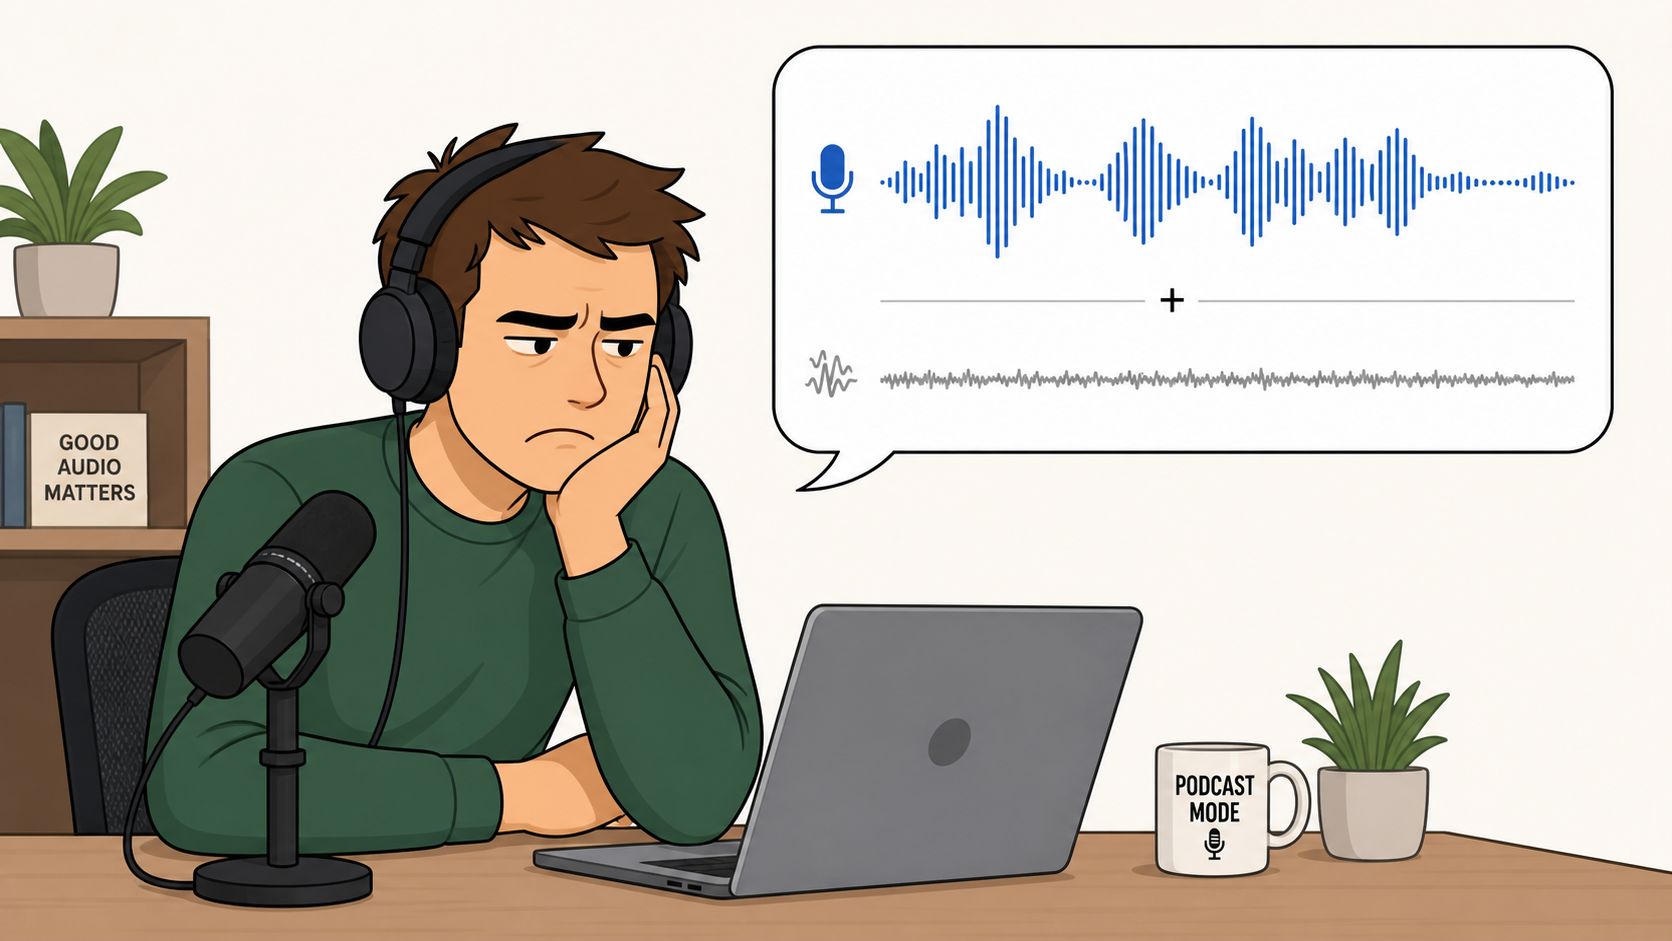
That moment matters because it pushes people into bad decisions. They crank noise reduction too hard, flatten the life out of the vocal, and end up with a voice that sounds watery or robotic. The recording is quieter, but it isn't better.
Clean audio is rarely about removing everything. It's about removing enough noise without damaging the part people came to hear.
The good news is that most noisy recordings aren't hopeless. Steady background sounds can often be reduced effectively. Rumble can be filtered. Hum can be targeted. Echo can be softened. Even messy recordings can usually be improved enough to become publishable, deliverable, or much easier to transcribe.
The key skill is choosing the right path instead of throwing every tool at the file.
A practical way to think about it is this:
- If you haven't recorded yet, fix the room and mic position first.
- If you need a fast turnaround, use AI cleanup and monitor for artifacts.
- If the recording is important or complex, move into manual tools and solve each problem type on purpose.
That mindset saves time and protects the voice. It also keeps you from chasing a perfect silence that your recording may never support.
The Best Fix Is Prevention How to Record Clean Audio
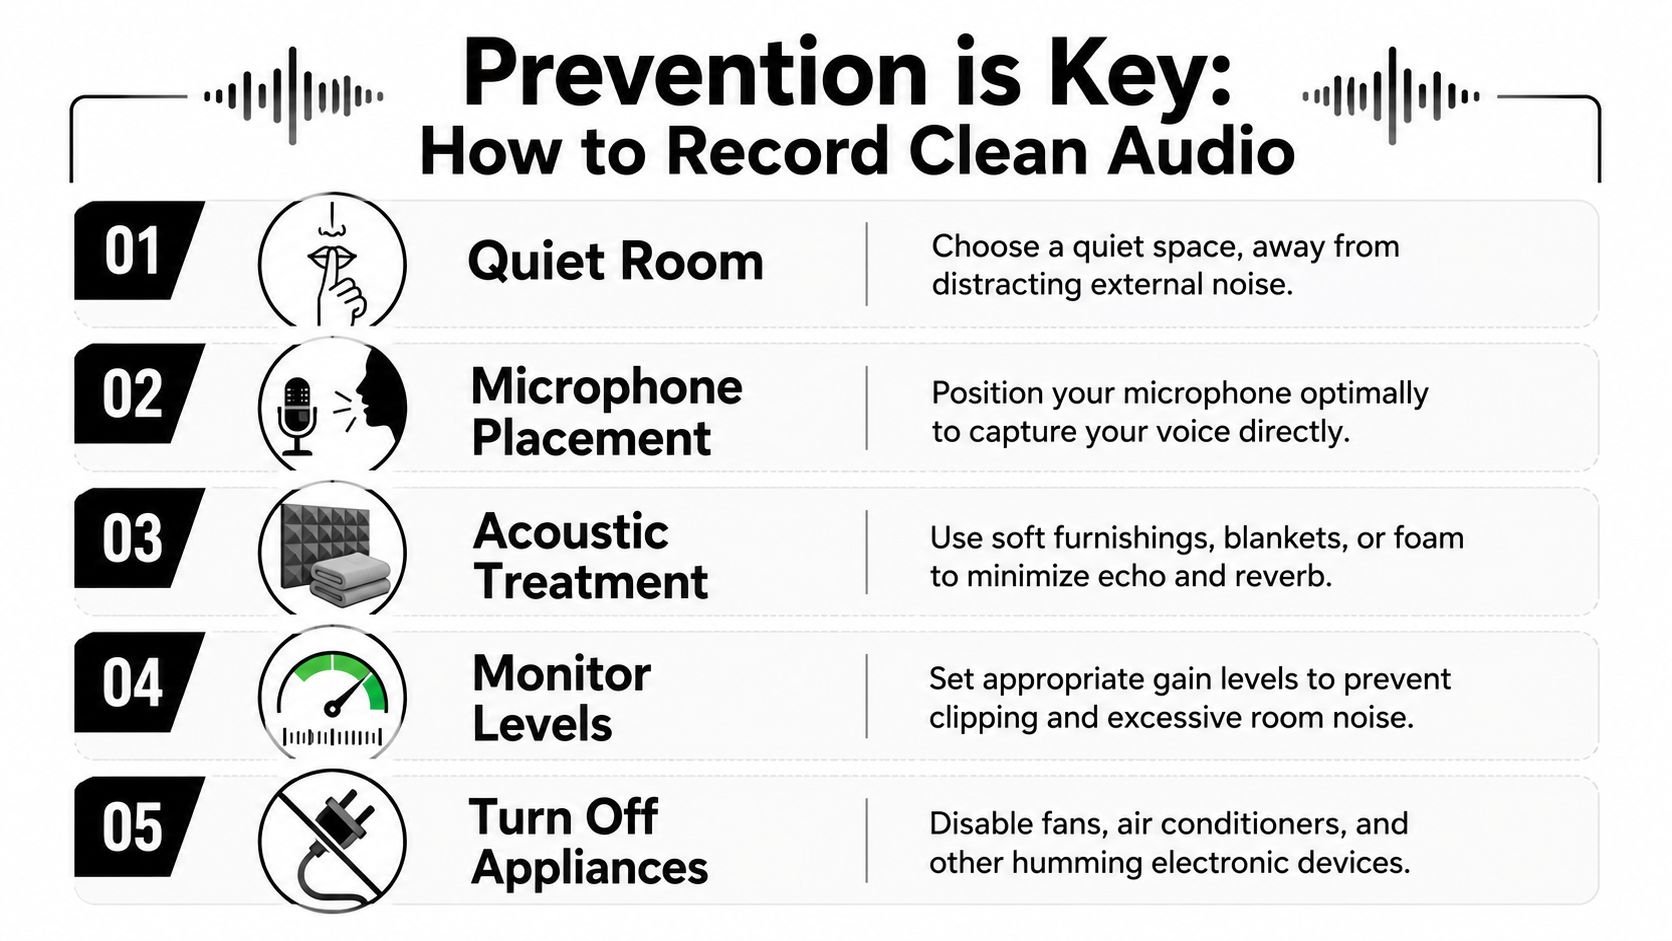
Most of the pain in post starts before record is pressed. If the mic hears too much room, too much appliance noise, or too much distance between mouth and capsule, you'll spend the edit trying to rescue a signal that was weak from the start.
Get closer and make the mic do more work
A microphone doesn't know what you care about. It just captures pressure changes. Your job is to make your voice much louder at the mic than everything else in the room.
If you're using a cardioid mic, work closer so your voice dominates the recording. That lets you run less gain, which means less room tone and less background buildup. Speaking from across the desk almost always creates more cleanup later than speaking from a controlled, consistent distance.
A few habits help immediately:
- Aim the mic correctly: Talk into the part of the mic it was designed to capture, not the side or top by accident.
- Hold your distance steady: Shifting in and out changes tone and level, which makes denoising less predictable.
- Monitor with headphones: You'll catch hum, fan noise, and mouth clicks before they ruin a full take.
Treat the room with what you already own
A hard room creates reflections. Your voice leaves your mouth, hits the wall, desk, window, or floor, and comes back into the mic a split second later. That's the hollow or roomy sound people describe as echo, even in a small bedroom office.
You don't need a full studio build to improve it. Soft, thick, uneven surfaces help. Blankets, curtains, pillows, rugs, and stuffed bookshelves all reduce reflections better than bare walls and glass. The goal isn't to deaden the room completely. The goal is to stop your voice from bouncing around long enough to be obvious on the recording.
Practical rule: If the room looks reflective, it probably sounds reflective.
Try recording away from windows, empty corners, and large tabletops. Face into softer materials when possible. Even moving your setup a few feet can change the sound more than any plugin later.
Set levels for cleanup before cleanup starts
Good level setting is part of noise control. Human speech mainly lives in the 80 Hz to 8,000 Hz range, and cleanup works best when you preserve that band, use a high-pass filter below 80 Hz for rumble, and normalize so speech peaks between -3 dB and -6 dB for clarity, according to guidance on speech-focused noise removal.
That matters because low-end junk below the useful speech range eats headroom and makes a recording feel muddy before you even start editing. At the same time, weak recording levels force you to boost everything later, including the noise floor.
A simple checklist before recording helps:
| Check | What you want |
|---|---|
| Room noise | Appliances off, windows closed, phones silenced |
| Voice level | Strong and consistent, not whispery or distant |
| Peaks | Controlled, not clipping |
| Low-end buildup | Minimized before it turns into rumble |
| Test playback | Listen back before the real take |
If you do this well, noise reduction becomes a finishing move instead of emergency surgery.
The Fast Track Method with AI Noise Removal
When time matters more than deep manual control, AI is the easiest path. Modern tools can separate speech from background clutter far faster than is typically achievable by hand in a DAW.
When AI is the right choice
AI cleanup makes the most sense when the noise is broad and distracting, but the file doesn't justify a long restoration session. Think podcast interviews, YouTube voiceovers, webinar audio, course material, call recordings, and quick-turn client work.
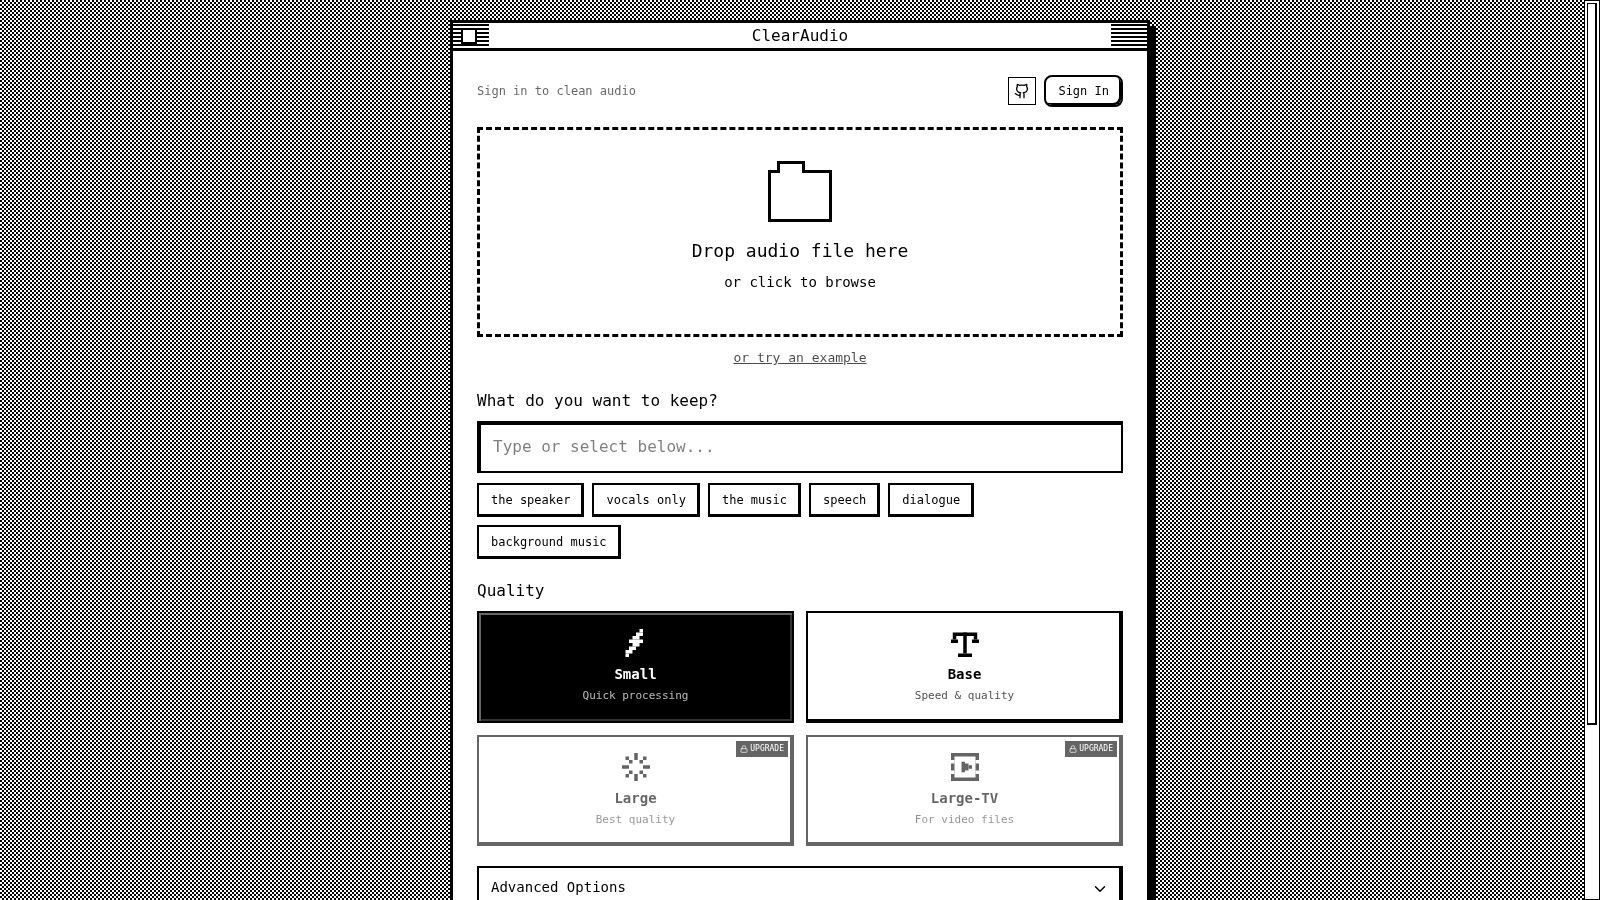
The appeal is obvious. You upload a file, choose the kind of content you want preserved, and let the model do the heavy lifting. You don't need to capture a noise print manually or chase frequency bands one by one. For many creators, that's the difference between cleaning a file now and leaving it messy because there isn't time.
According to technical analysis of noisy audio transcription workflows, state-of-the-art AI denoising models achieve 80-88% noise reduction with only a 3-5% artifact rate. The same analysis notes that these tools can reduce the noise floor by 15-25 dB, but users should calibrate strength at 40-60% to avoid stripping vocal harmonics in the 3-5 kHz range.
Those numbers match what experienced editors hear in practice. AI is strong at taking the edge off fan noise, broadband hiss, room wash, and general environmental distraction. It's much less magical when the voice is severely buried or when the recording is already thin and brittle.
How to get better results from one-pass cleanup
The biggest mistake with AI denoising is asking it to fix what the recording won't allow. Better input still gives better output.
Use this order:
- Trim obvious junk first: Remove dead air at the front and back if it contains handling noise, chair bumps, or random transients.
- Choose a moderate setting: Light to moderate cleanup usually preserves speech better than maximum suppression.
- Listen to consonants: S, T, F, and breath detail tell you quickly if the tool is overreaching.
- Check the noisiest phrase: A setting that sounds good in a quiet sentence may fall apart when the background gets worse.
Later in the workflow, it helps to see a practical demo in motion:
Where fast tools still need judgment
AI doesn't remove the need to listen critically. It just changes where you spend your time. Instead of building the cleanup chain from scratch, you evaluate whether the processed file still sounds human.
Two common failure modes show up fast:
- Hollow vocal tone: Midrange information gets pulled out with the noise.
- Robotic smoothing: The file becomes too even, too flat, and too synthetic between words.
If the cleaned version sounds impressive for three seconds but tiring after a minute, back the setting down.
For creators trying to remove background noise from a voice recording, AI is often the best starting point. Fast, efficient, and surprisingly capable. Just don't confuse speed with permission to stop listening.
The Manual Toolkit Advanced Noise Reduction Techniques
Manual restoration pays off when the recording matters and the noise problem is uneven. One tool rarely fixes all of it well. Audacity, Adobe Audition, Reaper, and similar editors let you choose the right move for each type of noise, which usually gets a cleaner result than forcing one global setting across the whole file.
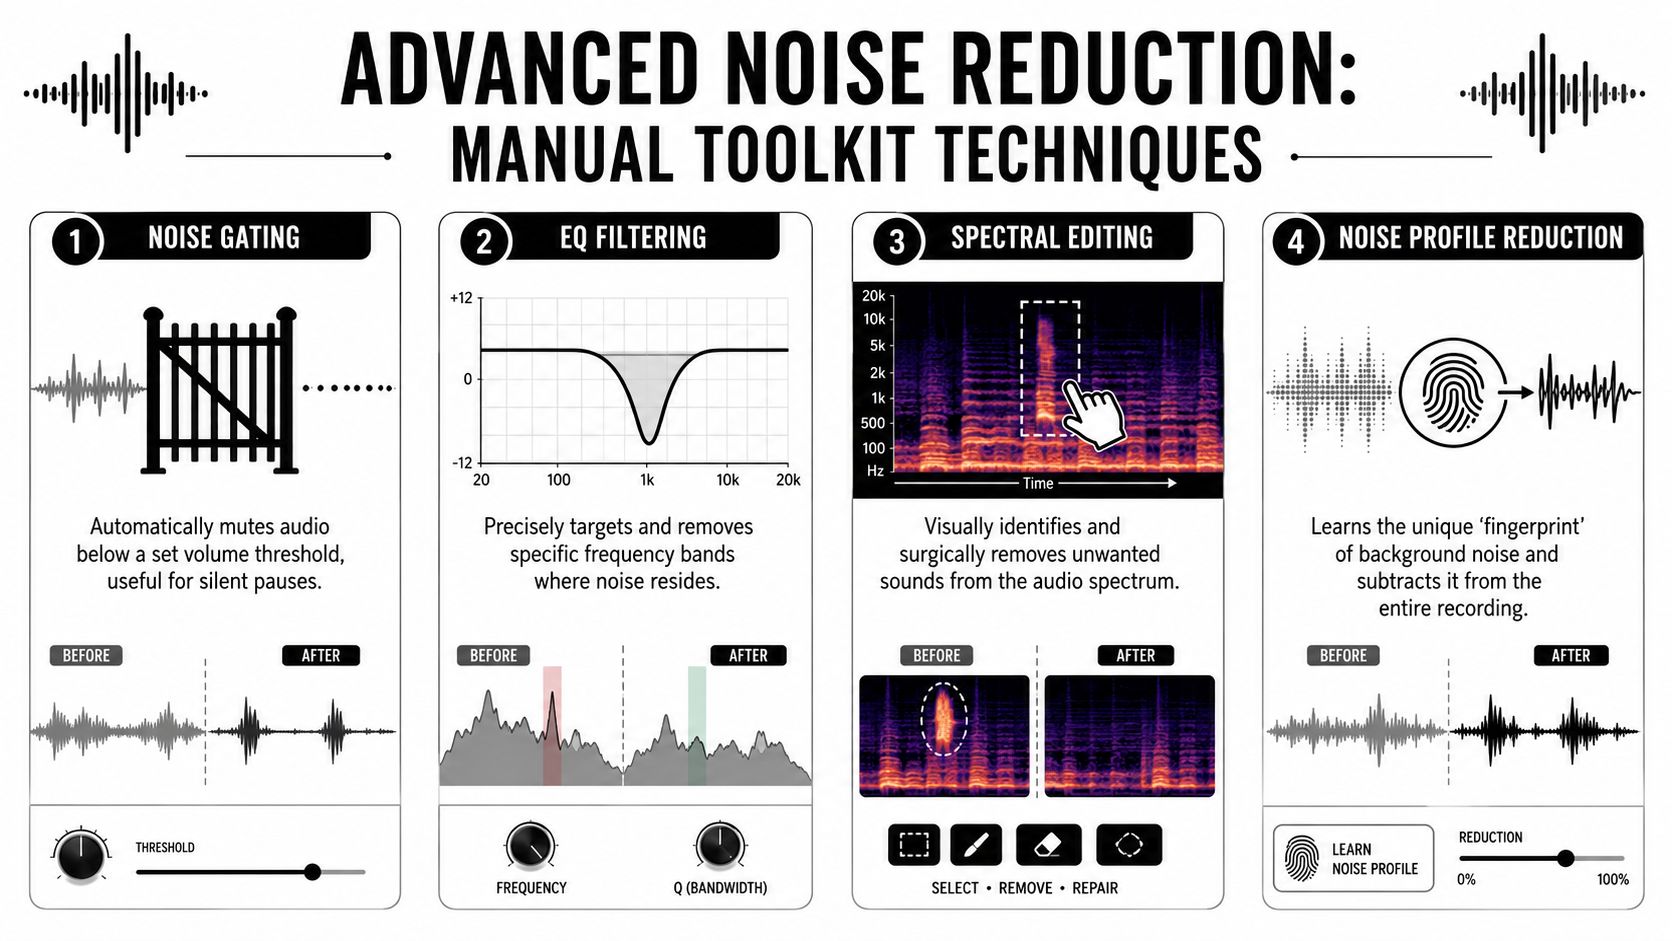
The trade-off is time for control. AI cleanup is faster. Manual work gives you better odds when the file has changing room noise, isolated distractions, or problem spots that only happen once.
Noise profile reduction for steady sounds
Noise profiling still works well on steady sounds such as fan hiss, HVAC wash, and computer noise. The method is simple. Capture a section where only the noise is present, build the profile, then apply reduction carefully across the affected audio.
The quality of that sample matters more than many creators expect. Timbrica recommends using a 10- to 20-second noise-only segment for profiling, then applying reduction conservatively in the 50% to 75% strength range to avoid hollow, phasey speech artifacts (Timbrica's guide to background noise removal).
That restraint matters. If you still hear a little room noise after the first pass, that is often preferable to a voice that sounds carved up.
Spectral editing for noises you can see
Spectral editing gives you local control. Instead of processing the full track, you target a visible event on the spectrogram and reduce only that event. It is the right tool for coughs, lip smacks, clicks, phone chirps, chair ticks, and other short distractions that do not justify broad denoising.
This approach takes longer, but it protects the voice because you leave unaffected parts of the recording alone. For spoken-word work, that selective treatment is often the difference between “cleaned up” and “overprocessed.”
Timbrica also suggests keeping manual spectral reduction in the 12 to 24 dB range, and reports that two light passes, such as 15 dB each, produced 30% higher perceived speech naturalness than one aggressive 30 dB pass (Timbrica's guide to background noise removal).
That lines up with real editing practice. Small cuts usually survive repeat listening better than dramatic ones.
Gates and expanders for pauses between phrases
A gate only acts when the voice drops below a set threshold. It does not remove noise under active speech. It cleans up the gaps.
That makes gates useful for spoken tracks with consistent pacing and a fairly stable noise floor. They can reduce room hiss, low computer noise, or headphone bleed between phrases. Push them too far and the track starts sounding chopped, with clipped breaths and word endings.
Expanders are often the safer choice for voice work. They lower the noise floor gradually instead of snapping the room tone fully on and off, which usually sounds more natural in podcasts, narration, and dialogue.
Use them carefully in these situations:
- Podcast voice tracks: Light control in pauses without making the silences feel fake
- Home narration: Reduces background wash between lines
- Interviews: Helps keep inactive mics from drawing attention
Skip them or use them very lightly in these cases:
- Highly dynamic delivery: Threshold settings will miss soft words or cut off endings
- Reverberant rooms: Gates do not solve reflections
- Weak recordings: Noise level shifts become more obvious, not less
EQ and filters for rumble and hum
EQ solves a different class of problem. If the noise lives in a predictable frequency range, targeted filtering is often cleaner than broadband reduction.
Start with the obvious fixes first. A high-pass filter can clear low rumble from traffic, desk vibration, or mic stand handling. A narrow notch can reduce electrical hum without flattening the whole voice. If broadband denoise starts damaging consonants, a small top-end cut may leave the voice more believable. Light low-mid cleanup can also reduce muddy room buildup that masks intelligibility.
| Problem | Tool | Why it works |
|---|---|---|
| Low rumble | High-pass filter | Clears useless low-end buildup |
| Electrical hum | Narrow notch filter | Targets the problem frequency without crushing the whole voice |
| Harsh hiss edge | Gentle top-end control | Reduces distraction if broadband denoise sounds worse |
| Muddy room tone | Broad low-mid cleanup | Opens space around the voice |
Manual cleanup works best as a sequence of small decisions. Filter what is obvious. Reduce only the noise you can identify. Split the file if one section needs different settings than another.
The best restored vocal rarely sounds processed. It just stops sounding troubled.
Beyond Noise Removing Unwanted Reverb and Echo
Why reverb is different from noise
Noise and reverb get lumped together, but they aren't the same problem. Noise is usually an added sound underneath the voice. Reverb is your own voice smeared through the room and fed back into the mic as reflections.
That difference changes the repair strategy. A steady hiss can often be subtracted because it's separate from the vocal content. Reverb is wrapped around the vocal itself. The tail of each word overlaps with the next sound. That makes dereverb much easier to overdo.
Rooms with bare walls, tile, glass, desktops, and empty space create the worst version of this. The voice loses intimacy. Consonants soften. Everything sounds farther away than the microphone was.
How to use dereverb without wrecking the voice
Dereverb tools try to identify the direct voice and suppress the reflected tail. Some do it well enough for practical cleanup. None of them can fully replace a dry recording made in a better room.
The right approach is usually conservative:
- Reduce first, don't erase: Aim to shorten the room impression, not make it vanish.
- Work before tonal polish: If you brighten the voice first, room reflections can become sharper and more obvious.
- Watch the body of the vocal: Heavy dereverb often thins the center of the voice and can make speech feel papery.
This is especially important for creators with softer speech, regional accents, or non-standard pronunciation patterns. A 2025 analysis of noise reduction and diverse speech clarity reported that standard noise reduction algorithms can degrade speech clarity by up to 15% for speakers with non-standard accents. That warning applies just as strongly when aggressive reverb cancellation starts shaving off phonetic detail.
If a roomy recording still sounds slightly live after treatment, that can be acceptable. If the voice becomes thin, lispy, or oddly detached from itself, the setting has gone too far.
A small amount of room left behind is often less distracting than a vocal that sounds carved up.
Final Polish and Export Best Practices
The recording can sound clean in isolation and still fail once it hits real playback. Final polish is the quality-control pass that decides whether your cleanup helped the listener or just hid the problem under processing.
Check the cleanup before you print it
Start with a strict A/B check against the original file. Level-match the two versions as closely as you can. A louder export often seems better for a few seconds, even when the voice has lost detail.
Then solo what the denoiser is taking away, if your tool offers a residue, difference, or preview mode. As noted earlier, moderate settings usually hold onto speech better than aggressive ones. If that residue channel contains consonants, breaths, or the edge of the words, the processor is cutting into useful material.
That test catches problems fast.
Use more than one playback device before you export the final file. Each one exposes a different failure point, and practical trade-offs become clearly apparent. A pass that sounds impressively quiet on studio headphones can feel thin on a phone speaker. A setting that leaves a little room tone may translate better across devices because the voice keeps its weight and articulation.
A short checklist keeps this honest:
- Headphones: Listen for hiss, watery artifacts, chirps, edit seams, and clipped word endings.
- Laptop speakers: Check whether the vocal still feels present without sounding brittle.
- Phone speaker: Catch harsh upper mids and over-thinned low mids quickly.
- Original versus cleaned: Confirm that intelligibility improved, not just silence between words.
A finished voice track should be easier to follow, easier to mix, and still sound like the person who recorded it.
If the cleaned version feels smaller, flatter, or oddly detached, revisit the chain. In practice, the better choice is often less reduction, not more. A trace of steady background usually draws less attention than artifacts that move with the voice.
Export choices that keep your work intact
Export is where good restoration work gets preserved or subtly damaged. One unnecessary conversion will not always ruin a voice track, but repeated lossy exports can soften transients, exaggerate artifacts, and make later edits harder.
Use a simple decision path:
- Archive or more editing ahead: Export a lossless master such as WAV or AIFF.
- Handoff to video editing: Match the session sample rate and bit depth when possible.
- Podcast or final upload: Export the format the platform expects, once the master is approved.
- Transcription workflow: Favor stable, natural speech over heavy loudness processing.
Keep the raw recording too. I treat the original file, the cleaned master, and the final delivery export as three separate assets. That extra file discipline saves time when a client asks for a revision, a different loudness target, or a lighter cleanup pass a week later.
Frequently Asked Questions
Can I remove background noise from a video file directly
Yes, in many workflows you can. Most modern editors and some web-based tools can process the audio track inside a video file without forcing you to export a separate WAV first. The key question isn't whether the file is video or audio. It's whether the tool gives you enough control to judge the result carefully.
If the audio matters a lot, many editors still prefer extracting or duplicating the audio track so they can process it with more precision and keep the original untouched.
Should I use a web app or a plugin inside my editor
Choose based on speed versus control.
A web app is usually better when you need a quick result, don't want to build a restoration chain, or you're cleaning straightforward speech recordings at volume. A plugin inside Audition, Reaper, or another DAW is better when the noise changes over time, when the project is multi-track, or when you need to automate different settings across sections.
A simple comparison helps:
| Option | Best for | Trade-off |
|---|---|---|
| Web app | Speed, ease, repeatable speech cleanup | Less surgical control |
| DAW plugin | Complex restoration, section-by-section work | Slower and more technical |
Can background noise be removed completely
Sometimes a steady noise can be reduced so much that it feels gone in context. But complete removal isn't the right expectation for most real-world recordings.
Every denoiser works on a trade-off. The harder you push to eliminate noise, the more likely you are to damage breaths, consonants, room realism, or vocal harmonics. The better goal is clear, natural, intelligible speech. Not absolute silence at any cost.
What if my recording has hum hiss and echo together
Treat stacked problems in a sensible order.
Start with the issues that are easiest to isolate. Rumble and hum often respond well to filtering. Broadband hiss may need denoise. Echo or room reflections usually need separate dereverb treatment. If you throw a single aggressive tool at all of it, you usually get the worst compromise from each category.
A practical order is often:
- Filter rumble
- Notch hum if needed
- Apply moderate denoise
- Use light dereverb if the room is still distracting
- Do final level and tonal polish
What should I watch for with soft speech accents or dialects
Be more conservative than you think you need to be. Soft speech gets mistaken for noise by weak settings and harsh thresholds. Distinct consonants in accented speech can also be dulled when the processor over-suppresses subtle detail.
If intelligibility is critical, listen to a few phrases with tricky consonants and natural cadence before approving the full file. Don't judge only by how quiet the background became. Judge whether the speaker still sounds like themselves.
For many creators trying to remove background noise from a voice recording, the winning move isn't a stronger setting. It's a smarter one.
If you want the quick route without wrestling with a DAW, ClearAudio is built for exactly this kind of cleanup. You can upload audio or video, choose what to preserve, and let the platform remove noise, hum, hiss, and room echo with far less manual work. It's a practical option when you need cleaner dialogue fast but still want control over how much of the original character stays in the voice.